Author: Marilyn Clark

How to Become a Plumber

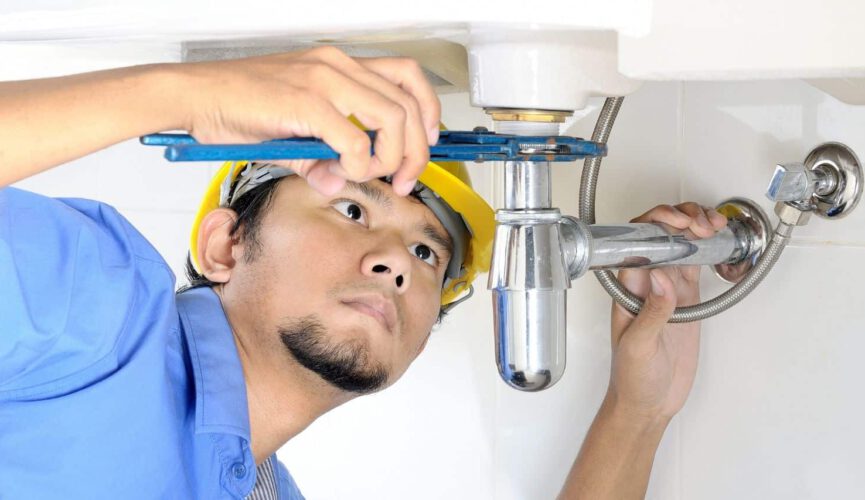
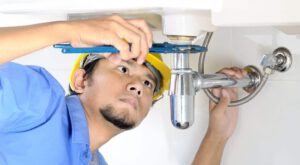
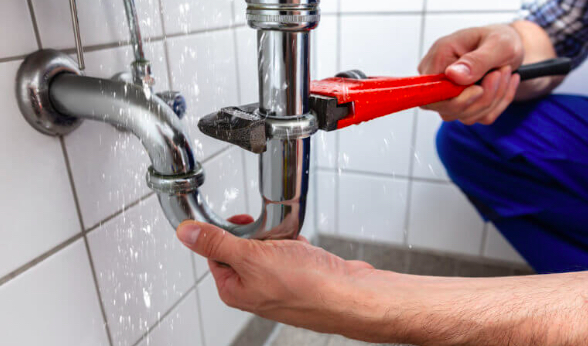
Plumber Woodland Hills install and repair pipes that carry water, waste, and gases. They also fix toilets and faucets and are in high demand during emergencies. Plumbers must have critical thinking skills to troubleshoot problems. They need to be able to read blueprints and work with tools.

Plumber

They must also be able to bend, crouch, and squeeze into small spaces. They need upper-body strength to run the equipment. They also need to be able to communicate verbally with customers and coworkers.

Plumbers are trained in a variety of ways, including on-the-job training and vocational school programs. They are also required to be licensed in the state where they work. In some cases, apprentices must have a master plumber as a mentor. Regardless of their training, it’s important for plumbers to keep up with changing technologies and procedures.

Besides repairing leaks and clogged drains, plumbers can do other tasks, such as installing new appliances and plumbing fixtures. They are often called upon to advise customers on water conservation and best practices when it comes to repairing, replacing, or maintaining plumbing systems. They can also assist in the design of new plumbing systems for homes or commercial buildings.

They are also trained in the installation of kitchen and bathroom faucets, toilets, showers, and other items. They are the first trade workers that homeowners or building managers turn to when they have a plumbing emergency. Some of the most common emergencies include blocked drains and faulty toilets. Although these problems are serious, they are minor repairs compared to other more complex issues that may occur, such as a burst pipe.

There are several routes to becoming a plumber, including formal college courses and apprenticeships. Most of these routes take between two and four years to complete. Apprenticeships are available through trade schools, unions, and other organizations.

Plumbers must have excellent critical thinking skills to be successful in their field. They must be able to weigh different solutions and make decisions quickly. They also must be able to communicate effectively with their clients, especially when explaining technical matters. This job can be physically demanding, requiring heavy lifting and working in tight spaces. It can also be dangerous, especially if safety precautions are not taken.

Plumbers must be able to read and write, and be familiar with blueprints and construction plans. They also must be able to do math and geometry to understand how plumbing systems work. In addition, they must be able to work well in stressful situations and meet deadlines. Many plumbers choose to work as independent contractors, which gives them more flexibility and control over their work schedules.

They are licensed

The plumbing industry is one of the most regulated trades in the United States. Plumbers must pass a series of exams and obtain a license before they can work in the field. There are several different routes to becoming a plumber, including attending a vocational school or completing an apprenticeship. The apprenticeship usually lasts about five years and includes classroom instruction and on-the-job training. Many apprentices are also members of a union, which helps them gain employment opportunities and earn higher wages.

Plumbers are responsible for installing, repairing and maintaining the pipes and fixtures that facilitate water supply, waste water disposal and heating in residential and commercial buildings. Their duties include inspecting and testing existing pipework to determine if the system is working properly. They also have to read blueprints and drawings to understand the layout of plumbing systems and to make necessary repairs. In addition to their technical knowledge, plumbers must have the ability to communicate effectively with customers and other contractors.

Plumbing skills include the ability to use a wide variety of tools and materials. They are also required to have good analytical problem-solving abilities. They need to be able to weigh options when deciding on the best solution for a customer. They must also be able to complete repairs within a specified timeframe. Plumbers must also be able to work in tight spaces and deal with hazardous materials.

Licensed plumbers must also keep up with new technologies and practices in the industry. They are required to attend continuing education classes, which help them stay up-to-date on changes in the industry. They must also adhere to a code of ethics. This ensures that they are providing quality service and minimizing the risk of contamination of drinking water or other environmental hazards.

It is important to hire a reputable and licensed plumber. If you choose to use an unlicensed plumber, you could be putting your home and family at risk. A reputable plumber will be insured and have the experience to handle all types of plumbing projects, from minor repairs to major installations. An unlicensed plumber will not have the proper training and will probably not follow the necessary safety measures. This can lead to costly mistakes that could result in water damage and health hazards.

They are insured

Plumbing professionals are not only licensed, but also insured. This insurance ensures that you’re protected against any potential damage to your property. It also protects you in case of an injury or accident on the job. Depending on your business size and types of work, you may need different kinds of plumbers’ insurance. For example, self-employed plumbers should consider getting business income insurance, which pays a fraction of their salary to help them maintain their standard of living in the event that they become ill or injured while working on a project.

Whether it’s a broken toilet, clogged drain or water system issue, plumbing problems can be costly. Luckily, a good plumber will have all the tools and knowledge to fix them quickly and efficiently. A reputable plumber will also have emergency services that provide round-the-clock assistance and repairs, even during the middle of the night.

In the midst of a fast-growing economy, New York’s vast array of residential and commercial buildings require efficient water and waste disposal systems. Plumbers are responsible for ensuring that these systems function properly, providing access to clean water and effective drainage in high-density urban areas. In a state with such premium property values, it’s essential for plumbers to carry general liability insurance.

California’s diverse economic landscape includes bustling urban centers and thriving agricultural regions. In addition to traditional industries like agriculture and manufacturing, the state’s modern sectors of logistics, media, and technology contribute to its growing economy. These industries have a direct impact on the state’s infrastructure, and plumbers play an important role in ensuring its health.

Because plumbers often travel between jobs, they need to transport their equipment and tools. This can be a risky proposition, especially since many thieves target small businesses. If a plumber’s equipment is stolen, it can be expensive to replace it. General property insurance can help protect these expenses by covering the cost of replacing damaged or stolen equipment.

While some states don’t require plumbers to carry business insurance, it is highly recommended. Some clients may even ask for proof of this coverage before agreeing to work with them. Having proof of insurance will not only reassure customers, but it can also increase your professional credibility.

They are available

While plumbing is a male-dominated field, women are becoming more involved in the industry. As a result, they have many advantages to offer businesses. These include lower costs, better customer service and improved job performance. Women are also more likely to stay in their careers and are able to find better work-life balance than men. For these reasons, it is important for employers to consider hiring more women plumbers. A few simple changes to the job posting and interview process can make a huge difference.

Another advantage of being a plumber is that it can be a lucrative career choice. Plumbers make a good living and can often advance their careers to become master plumbers or even run their own plumbing company. In addition, they can work on a variety of projects and industries. Moreover, plumbers have a very flexible schedule. They can work more in times of high demand and less when they are not busy. This flexibility can help them enjoy a healthy lifestyle.

Being a plumber is a physical job and can be stressful at times. However, it can also be rewarding and satisfying. Plumbers get to meet people from all walks of life and can feel like they are making a difference in their communities. In addition, they can spend a lot of time with their families.

Plumbers are also in a unique position because they are needed in all economic conditions. Even if the economy is down, there will always be someone with a leaky toilet. The plumbing industry is also highly regulated, so you can feel secure in your career.

If you are interested in becoming a plumber, it is important to get an education. You can do this at a vocational school or community college for much less money than a traditional college degree. Alternatively, you can also enroll in an apprenticeship program that will pay you while you learn, allowing you to graduate debt-free.

In addition to your regular salary, plumbers can earn extra income from social media channels and blogs. They can also make money from writing books and teaching classes on how to do simple plumbing tasks. This extra income can be beneficial for a family or for paying off debts.

Home Building – A Complex And Costly Project

Home building is a complex and costly project. But if you have the proper mindset and fluid communication, it can be an exciting experience.

Start by researching local builders in your area. Look at ads in your real estate section of the newspaper or online and ask friends and neighbors for recommendations. If you need assistance, call J&R Construction experts.   

home building

Location

The location you choose for your home will have major impacts on design opportunities, constructability, and costs. It will also affect the daily enjoyment of your home for years to come. Whether you’re building on an island, in the mountains, on the lake, or a golf course, the characteristics of your site will dictate many of your design decisions.

You’ll want to familiarize yourself with the area in which you’re building, including crime rates, school systems, and amenities like grocery stores and gyms. If you plan on having children, it’s important to know about the schools in the area and speak with parents about their experiences.

Building your home close to local resources will save money on transporting materials and labor long distances. However, this may limit your choices in terms of material palette and design. You’ll also need to decide how you will financially support yourself and your family in the new location. This will include determining how much you can afford to pay for your mortgage, as well as other living expenses.

Design

Building a home is an exciting process, where you have the opportunity to shape every aspect of your new dwelling to align with your vision and preferences. However, this can be a complex task that requires the guidance of professionals. Their expertise and industry insights can save you time and money while eliminating potential pitfalls.

The design stage involves turning your ideas into comprehensive architectural drawings and floor plans, which will serve as the blueprint for the construction of your dream home. This is also an opportunity to explore different materials and finishes that will make your new home stand out from the crowd. It is important to balance your creativity with practicality, taking into account daily routines and family members’ needs. This will ensure that your new home is both beautiful and functional, meeting all your requirements and supporting your lifestyle.

With the availability of affordable building materials and construction techniques, you can now choose between a wide range of styles, sizes, and features. The options for constructing a house have never been greater, from timber-framed structures to steel-and-concrete-frame homes.

While choosing the right design and style for your new house, it is also important to consider your budget and any plans you might have for your property. For example, you might want to add a deck or patio, pool, or other outdoor features. It is important to discuss these options with your builder at the beginning of the project.

Production builders often study consumer trends when designing homes. For example, they know that a growing number of consumers are interested in energy-efficient features such as insulation and Energy Star appliances. However, they must ensure that these features won’t increase the price of their homes beyond what their target market can afford.

The key to success when designing your own home is to ask and answer the right questions. For example, you need to think about the size and layout of your property, as well as the proximity to schools, shopping, and amenities. You should also be aware of any standing neighborhood covenants that might impact your new construction.

Financing

Home building is expensive, and even more so when you add a lot of upgrades. To keep your budget in check, you will need to find the right lender to finance the project. Most lenders recommend that you borrow only up to two times your annual income, and the process for getting preapproved for a construction loan can take several months.

Lenders will want to know your choice of builder, and they will also need to approve your construction plan. They will likely request a signed contract, blueprints, line-item budget, and payment schedule. Depending on your lender, you may be required to have homeowners insurance with builder’s risk coverage while the house is under construction.

Production builders who build homes in communities usually have a model home or series of homes that you can tour to see the style and quality of their work. They pay close attention to consumer surveys, hire mystery shoppers, and comb through economic and demographic data to make sure that the houses they’re building will have a market.

If you’re considering a custom-built house, you’ll have to find a licensed builder who is familiar with your local regulations and will be able to complete the home on time and within budget. Ask for recommendations from friends who have built their own homes or search online to find local builders. The National Association of Home Builders has a directory of certified builders.

If you’re planning to buy a new construction home, you’ll need to secure a lot loan to purchase the land. Most lenders then provide a construction loan that releases periodic disbursements as each phase of the house is completed, and when construction is finished, you’ll convert the construction loan into a permanent mortgage. Some construction loans charge interest only on a variable-rate index, while others use a fixed rate during the entire process and then convert to a fully amortized principal and interest payment. The lender will send a home inspector to verify that the progress is on schedule and that the builder has met specifications. In some cases, the lender will only release a draw when the builder has provided evidence that the work has been completed to the lender’s satisfaction.

Construction

Building a home involves a series of steps. Construction of any structure takes time, but constructing homes can be particularly laborious due to rising land and materials costs. This is compounded by the fact that demand for new homes often outpaces builder capacity, resulting in long wait times between home tours and closing dates. For these reasons, prospective buyers should understand the construction process before choosing a builder.

The first step is planning and design. This involves working with a design professional to draft plans for the house based on the client’s wishes and requirements. This may take several weeks or months to complete. Once the plans are complete, a contractor for the project will prepare estimates to help the client determine the final budget for the house. During this stage, it is a good idea to use tools that allow designers and homeowners to communicate ideas with compelling visuals that put clients inside the designs, from different angles, at various times of day.

Next, the builder clears the site of brush and debris to make way for the house. They will also grade and drain the lot to prepare it for construction. If the builder owns the land, they may do this themselves, but if they are working with a developer or an owner-builder, they will subcontract these tasks to specialized tradespeople.

Construction can be a complex process, but if the builder has planned and taken into account any known risks, they will minimize the chance of cost overruns. For example, in preparing a quote, the builder will include contingency sums that can be drawn on to cover unforeseen ground works, changes in material or freight costs, and other delays.

It is also a good idea for the builder to have a supervisor on hand to make sure that sustainable design practices and materials are used. Builders may be tempted to expedite the construction of the home to meet client demands, but this can lead to less environmentally friendly alternatives being chosen. A supervisor can check for these things and provide input if needed.

A Guide to Bathtub Installation

Bathtub installation can feel like a major project, especially when remodeling a full bathroom. Follow this guide to make the job easier and avoid costly mistakes. If your old tub surround is glued to drywall, pull it off with a pry bar and hammer. Add new 2×4 nailers to the studs to support a ledger board where necessary. Visit Website to learn more.

plumbing

If you’re installing a new tub, it’s important to do things correctly. The tub needs to be properly supported so it doesn’t flex when you stand on it, and the plumbing must be connected to it correctly so water doesn’t leak or back up through the wall. If you’re uncomfortable with doing this kind of work, it’s best to hire a professional plumber.

Before you start working on your bathtub installation, make sure the water is turned off and that the old drain plumbing is disconnected. Also, turn off your home’s main water supply line in case there are any problems with the pipes during the process.

Next, lay down a piece of cardboard or plywood over the floor where you’re working to protect it from damage. You’ll need to remove any nails or screws that are anchoring the tub flange to the studs in order to remove and install the new one. It’s also a good idea to cover the surrounding walls with a plastic sheet to prevent any splashes of mortar.

Use a pry bar or screwdriver to loosen and remove any screws or nails holding the flange of the tub in place. After the flange is removed, use a pair of pliers to loosen the drain stopper and linkage. Then, disconnect the trip lever and rocker assembly by turning them counterclockwise to open it. You may need a wrench to do this, depending on the type of drain you have.

Once all the parts are removed, carefully slide the new tub into the alcove. Ensure the bottom lip of the tub is resting on your bed of mortar, and use a level to check that it is straight. If it’s not, you can correct the problem by mixing more mortar and re-laying the lip.

Now, if the manufacturer has given you specific instructions about where to set your tub, use your level to determine that the flange is in the center of the studs. If not, you can adjust the studs by drilling or tapping them in place to make sure they are straight. Now, you can connect the waste and overflow pipe to the drain outlet using plumber’s putty and Teflon tape, which you can tighten with a wrench.

Ledger Board

The ledger board is a critical part of the bathtub installation process because it reduces the amount of weight and stress that is put on the deck framing and tub flange. It also prevents moisture from leaking into the house. If you are installing a new deck, the ledger board should be installed before you dig your footings and set posts. It should also be used as the basic point of reference for determining all the joist framing.

Look at your house and determine if it is sided with traditional lumber frame under clapboard or beveled wood siding. If it is, a small section of the siding will need to be removed so you can attach the ledger board. Once the ledger is in place, it is secured to the house wall using joist hanger brackets and treated deck screws. The joist hanger brackets are pre-bent to fit the inside corner of the ledger and building wall. They are also affixed to the ledger with special 1-1/2″ long double hot-dipped zinc coated joist hanger nails.

Find the height that you want your tub to sit at and mark it on the ledger board. Then mark a line 5.5″ above that on the siding under the ledger. Fold a piece of ledger tape into that spot, remove the release liner and press to adhere.

Screw the ledger board into the joists, being careful not to screw into the flange of the bathtub. Screws should be spaced about 4′ apart or so. Some builders used to use nails for this job, but lag screws are more durable and will hold stronger because of their metal construction.

When you’re done, use Kerdi-Fix to seal the holes that were created. This is important because you want the walls to be as flat as possible for a strong and professional finish.

Check the manufacturer’s specifications for your tub to see if there are specific distances you need to account for on the ledge where the stringer board is mounted. Find the studs in the wall where you marked the ledger and mount a 2×4 to that location. This will be the stringer board that supports the tub. Screw this into the joists with structural lag screws (also called “heavy duty” screws).

Faucets

Before you can set the bathtub in its alcove, you’ll need to install the faucets. You can’t do this until you’ve disconnected the water supply lines (Photo 1). Locate the shutoff valves, usually in an accessible panel in another room or the basement. Turn them off to cut off the water, then take apart your existing shower head, tub spout and handle (Photo 2). Put the parts in a bag or box for safekeeping.

Use a screwdriver to unscrew the faucet hardware from the back of the wall. Identify the type of drain assembly, and get a replacement that matches it. If you’re replacing an old bathtub, you can reuse the spout and drain cover but you’ll need to find or purchase new tub filler and drain shoe.

Once you’ve removed the old faucet assembly, make a mark on each wall stud across the top of the tub flange. This will indicate where to locate the new stringer board. Cut a two-by-four to match the length of the new flange and line it up with the marks on the studs. Screw the board to the studs with exterior grade screws.

Before you place the new tub in its alcove, look down the front of the tub to see if there’s a 1″ gap between the bottom of the tub and your floor below. This will ensure that the tub sits on a solid surface and that the overflow tube and drain shoe fit well.

If you’re using a standard chrome-plated or nickel-plated finish, paint the overflow tube and shoe with enamel paint to match your tub. Otherwise, you can buy matching paint from the tub manufacturer.

If you’re installing a ceramic-disk cartridge faucet, you don’t need to paint it. These high-tech faucets are extremely durable and easy to repair. However, they’re expensive compared to other types of tub faucets, and you might have trouble finding an experienced plumber to repair one if it breaks down. For this reason, many builders recommend that homeowners stick with name-brand products from wholesalers they can trust to stand behind their products.

Drains

A tub needs a drain and, in most cases, a waste-and-overflow (WO) pipe. Using the tub manufacturer’s directions, drill holes for these accessories. Some bathtubs include an insulated support structure on the bottom; in this case, you don’t need to install additional pipes. Otherwise, mix a batch of mortar and spread a thick layer where the main tub drain will be. Be sure to leave several inches clear of the primary drain location. Some manufacturers advise that you drill through the acrylic tub flange and drive screws to the studs, while others recommend hammering nails into the ledger board (which is also called a “stringer”).

If your new tub has an overflow tube and shoe, install these as well. It’s a good idea to lay out a diagram before you start work, since every bathtub is a little different and each has its own specific installation requirements.

Test the water flow and connections by filling the tub and turning on the hot and cold faucets. If everything is fine, you’re ready to move on to the next step.

Before installing the tub, note how the apron — or outer edge — meets the finish floor. If there’s a gap, you can fill it with a silicone sealant.

It’s a good idea to build in an access panel that’s large enough for you or someone working for you to reach the old drain and tub fittings. You’ll need access later to repair or replace these, and you don’t want to be left without a way to get to them in the middle of a project.

Once the ledger board is crewed, it’s a good time to add the drywall to the ceiling around the tub. If you’re not going to tile the walls, it’s especially important that you put a moisture barrier on the drywall and use water-resistant caulking to seal all joints. In some cases, you’ll need to add a sheet of plywood or cement backerboard as an additional water barrier beneath the bathtub.

Driveway Repair Tips

Driveway cracks, divots, and sinkholes are more than just unsightly—they can also compromise the structural integrity of your driveway. It’s important to address these issues as soon as you notice them. The good news is that most of these repairs are quick and relatively simple as long as you have the right materials and tools. Read on Driveway Repair Charleston SC to learn more driveway repair tips.

Construction Services

A ragged-looking driveway can make a bad impression on guests and slow the overall sale of a home. It can also be a hiding place for weeds and roots that quickly damage the surface when they establish themselves. Homeowners can keep their driveways in good shape by promptly addressing mild cracks and cleaning away stains.

Before tackling a driveway repair project, homeowners should clean the area around their driveway to remove any dirt, debris, or weeds that have grown in the cracks. They can use a garden hose or a power washer to loosen any dirt in the cracks and then use a broom or brush to sweep the surface free of dirt.

Stains like mud and mechanic’s grease are fairly easy to remove when they are fresh. But if you have left-over stains such as paint or motor oil that have been sitting for a long time, they may be more difficult to eliminate.

Bleach will not harm concrete when it is used at full strength, and a strong solution of one cup of bleach per gallon of water can be effective in most stain-removal applications. However, you may need something more potent for tough stains, and hardware stores and large home improvement retailers often stock concrete cleaners and stain removers that can be purchased at full-strength.

The ultra-absorbent properties of cat litter are perfect for soaking up any fresh oil spills, and you can also sprinkle sawdust on top of the stain for a similar effect. If these remedies don’t work, you can try a mixture of baking soda and water or a commercial degreaser such as trisodium phosphate (TSP). These products are available at most hardware and big-box home improvement stores. Always follow the manufacturer’s instructions for proper usage.

Determine the Extent of the Damage

If your concrete driveway has a lot of cracking, holes and discoloration, it is definitely time for repairs. These are typically covered under homeowners insurance, depending on the damage. It wouldn’t be covered, however, if the accident was caused by something outside your control, such as a tornado or a falling tree.

In some cases, a homeowner may be able to perform some of the repair work themselves. This is usually the case for small cracks less than a quarter of an inch wide. A simple crack filler can be purchased at most home improvement stores for between $10 and $15. It is important to address these cracks before they become larger and can hold water that will freeze and further deteriorate the concrete.

More serious cracking, such as a gator crack (a series of parallel lines that resemble a gator’s skin), will require professional attention. It is important to determine what caused the cracking and correct it. For example, if the problem is due to freezing and thawing, removing some of the topsoil and re-grading the area will help. It’s also a good idea to avoid parking heavy vehicles on the driveway if possible.

In some cases, the whole section of the driveway will need to be replaced. This is most likely the case if the sinkhole has grown too large, or if the sinking is being caused by a failing foundation. In this situation, a professional can often use PolyLevel to stabilize the concrete quickly and inexpensively. This is a special type of expanding foam that works extremely well on concrete. It isn’t a permanent solution, but it can give the driveway a new lease on life for years to come.

Patch the Crack

Small cracks less than 1/4 inch wide aren’t a problem, but if they are allowed to get wider by water seeping into them, freezing and expanding, and vehicles driving over them, your driveway could be in for trouble. To prevent these cracks from getting worse, use a rubberized asphalt-emulsion crack filler to patch them.

Before beginning, clean the area well with a brush and hose. Make sure the crack is free of dirt, grass or other debris that might prevent the sealant from adhering properly. You can purchase a kit that includes the right kind of crack filler and non-sag asphalt concrete repair sealant for your specific driveway material.

Once you’ve cleaned the area and widened the cracks to at least 2 inches, shovel the packaged cold-patch blacktop into the hole. After filling, smooth it out with an iron rake and use the hammer to undercut the edges. This will help lock in the patch and prevent it from ripping out later on.

It may take a day or two for the patch to completely cure, and you should not seal it during this time. However, once it is ready, you can begin sealing the rest of your driveway as directed on the label.

This will prevent the cracks from reopening and give you several more years of use before your next project is needed. If you’re looking for a longer-term solution, resurfacing the driveway involves scraping off damaged sections and pouring on new asphalt or concrete. Although it’s more expensive than just patching, it can add several years to the life of your driveway. Just keep in mind that this method is not as durable as replacing your driveway completely.

Repair Sunken Sections

It’s not the kind of thing that anyone gets excited about showing off to guests, but a driveway in disrepair does more than just detract from your home’s curb appeal. A poorly maintained driveway can also be a serious safety hazard, especially if the cracks in the concrete allow weeds and grass to grow through. And, of course, driving on a cracked or sunken driveway can damage your vehicle’s tires and undercarriage.

While it’s perfectly normal for a driveway to sink a little over time, when sections of the concrete are 4 or 5 inches lower than the rest of the surface, it’s definitely time to get things fixed. If left unaddressed, the voids can continue to expand and eventually undermine the entire structure of the driveway.

Driveway sinkholes can be caused by many factors, including erosion and settling of the soil underneath the concrete. To prevent this from happening, make sure that downspouts and rainwater drainage are working properly to divert water away from the driveway. If the sinking is occurring in a specific area, consider contacting a soil engineer to determine if there is an underground issue at play.

If you decide to take on the job of repairing your own sunken sections, start by thoroughly cleaning the damaged area. Then, you’ll need to prepare the surface for patching by removing any dirt, mud, or vegetation that is obstructing the repair materials from adhering to the asphalt or concrete. Once the surface is clean, you can apply an asphalt emulsion patch or an alligator asphalt to the damaged section of the driveway.

Once the patch or alligator asphalt is applied, you’ll need to smooth out any rough edges with a hand sander or orbital sander fitted with coarse-grit sandpaper. This will ensure that the repaired section is flush with the surrounding surface and that the repair blends seamlessly into the overall appearance of your driveway.

Smooth Out Any Rough Edges

If you leave small cracks untreated they will get bigger and can spread down the entire length of your driveway. Replacing a whole driveway is a major undertaking and expense so repairing small cracks as they appear will prevent them from becoming larger problems.

Asphalt is also susceptible to damage from traffic and freeze and thaw cycles. If the surface begins to lose its original integrity it can create large cracks or sinkholes that can be a tripping hazard for anyone who uses the driveway. These types of serious issues require professional concrete or asphalt driveway repair from a specialist who can handle complex repairs with ease.

Minor cracks can be repaired using an asphalt emulsion sealant or gilsonite. Both are available in a spray format that makes application very easy and produces excellent results. Follow the product’s directions for application and squeegee the area thoroughly for best results.

Larger cracks may need to be tamped down using a pothole tamper or even a vibrating plate compactor. This is necessary to help the repair materials adhere to the existing asphalt. This tool will also compress the asphalt aggregate and make it last longer and give your driveway a more uniform look.

A broken driveway can significantly reduce the curb appeal of your home. It can also be a tripping hazard especially for those who are physically challenged. Having it professionally repaired will not only increase the curb appeal but can also help protect the investment in your property. It can also help to keep family and friends safe when walking or driving on the surface. In addition, it can help to lower your insurance rates since a damaged driveway can be considered an eyesore and a tripping risk for drivers or pedestrians.

Fencing Services – Things to Consider Before Hiring a Fencing Contractor

There are several factors to consider when hiring Fencing. Some of these include the type of fence you want, the cost, and the contractor’s experience. Additionally, you may want to know whether they have the proper liability insurance. Before hiring a fence contractor, you should read customer reviews and check the Better Business Bureau website. Additionally, a professional fence contractor will let you review their contract before you agree to it.

Fencing Services

The cost of a fence installation can vary widely, depending on the size of the project, the fence material, and the labor involved. Professional fence installers can charge anywhere from $5 to $20 per linear foot. Do-it-yourself homeowners can save up to 50% by doing the work themselves. However, fence installation is a complex process, and if you’re unsure of your ability to do it correctly, call a local fence contractor.

The cost of a fence installation can also vary widely depending on where you live. If your property is located in an easily accessible neighborhood, the cost of a fence installation will be lower than in a remote or hilly area. In addition, fence installation can be more costly if there are obstacles in the yard.

The cost of a fence installation varies greatly depending on the materials used and the style chosen. Aluminum fences are less expensive than wood and can range from $20 to $50 per linear foot. Wooden fences are also more expensive, but they are more durable. Composite fences are more affordable than wrought-iron fences, which can cost hundreds of dollars.

Fencing for large properties can be quite costly. Unless you’re planning on having livestock, you shouldn’t install barbed wire or ornamental wrought iron fencing on your property. Even if you don’t have livestock, certain types of fencing are better suited to a large area of land.

If you’re planning to sell your house, investing in a new fence can increase the value of your property. Since buyers want to see how well a home looks, a new fence installation can give you a competitive edge over your competitors.

Whether you’re looking for privacy or deterrence, there are a number of different types of fences available. Fences are used to separate properties, prevent trespassers, and ensure that your pets stay inside. They also help protect your landscaping and add architectural value to your property.

Some fences are made of wood, but others are composite. Composite fences are very affordable and can mimic the appearance of wood pickets. However, these fences are not as sturdy as wood fences. Nevertheless, they are great for privacy and are resistant to extreme weather conditions.

A wood fence can last a long time with moderate maintenance. A yearly application of a penetrating sealant will help to preserve the wood’s color and prevent it from fading. This treatment should be done as soon as the fence is installed and every year thereafter.

Wooden fences require more maintenance than synthetic materials. However, depending on the type of wood, they can last for decades. They also provide privacy and good looks. Using large horizontal planks can give the fence a unique look. In addition, wrought iron fences give your home a classic, classy look. These fences are sturdy but can be see-through, making them a great option for curb appeal.

Another type of fence that can be used for privacy is a cap and trim fence. These fences are commonly seen on larger properties and farms. They are generally white, but you can also opt for a different color. Cap and trim fences are durable and look great, but they may be more expensive than other types of fences.

Before hiring a fence contractor, it’s a good idea to ask about their experience. A good contractor should have a portfolio on hand and be willing to provide references. A good fence contractor can point to at least three satisfied clients. Also, be sure to get an estimate from the contractor in writing, which will include a site plan and numbers. There shouldn’t be any hidden fees or charges, and you should be able to ask the contractor about small details and any deviations from the original plan.

Experience matters – A fence contractor with a solid track record of satisfied customers will likely be able to answer any questions you might have. If the contractor is experienced in your local area, he or she will be able to guide you toward the best choice. You should also check the contractor’s certifications and previous work history. This is a strong indicator of the quality of the company.

Garbage Disposal Repair Tips

There are many ways to get rid of a clog in a garbage disposal. These include identifying the problem, replacing a splash guard, and resetting the disposal. You can also use a wooden spoon handle as a lever to free a stuck flywheel. If you are unable to reach the flywheel, you can use a flashlight to see inside the disposal. Then, if you can see any foreign objects, you can remove them. Once the disposal is free of foreign objects, turn back the power at the main service panel and press the red reset button on the bottom of the disposal.

garbage disposal repair
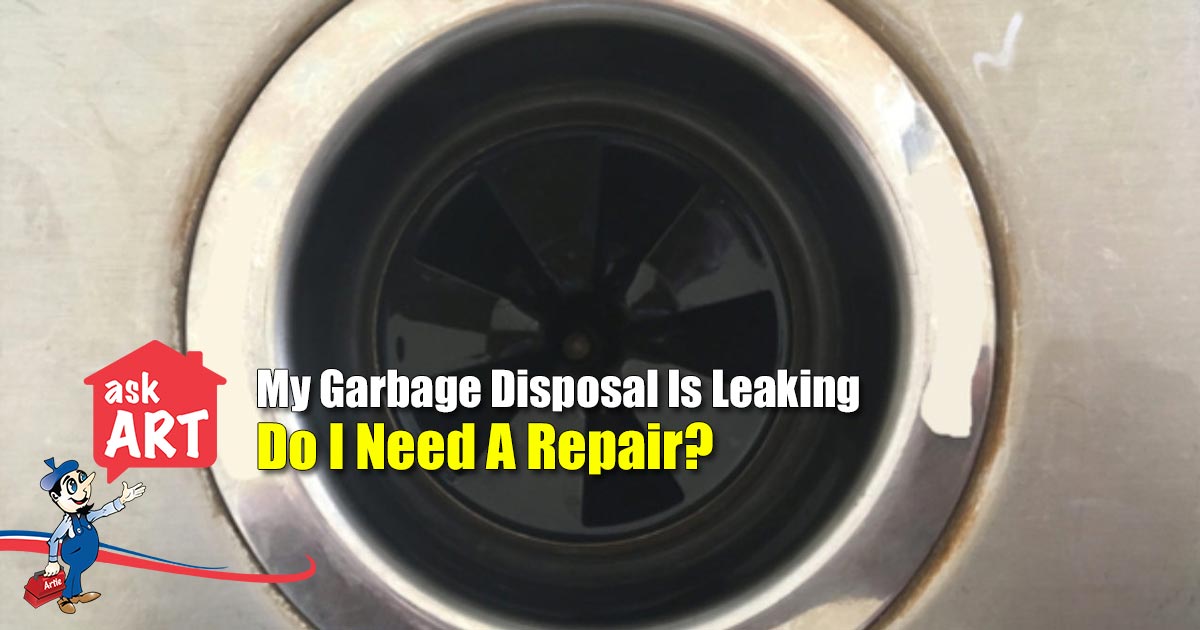
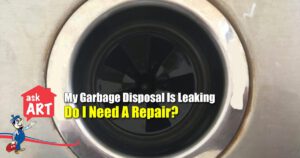
There are several ways to get rid of a clog in slop sinks and garbage disposals. Using your hands to push garbage through the disposal can make the clog worse. It can cause water to come back up because of a piece getting stuck in the drainage pipe. To fix the clog, you can use a set of pliers or tongs to pull out the loose gunk. Another option is to call Garbage Disposal Repair expert to come and uninstall your disposal and clean it. This can cost a lot of money, so be prepared for it.

Before you try to remove the clog, you need to cut power to the disposal. If your disposal is an older model, you need to unplug the power at the fuse box. Once you have disconnected the power, use a flashlight to look into the drain. You can also try digging through the debris with a small scrub brush or a straightened coat hanger.

When you’re dealing with garbage disposal repair, the first step is to determine where the leak is coming from. Usually, leaks happen in the sink flange area. The sink flange is the gasket that creates a seal between the disposal and sink. If you notice a leak in this area, it’s likely the flange gasket has become loose or has cracked. It is also possible that the disposal has a problem with a pipe or hose. If so, you need to replace those parts.

A leak in the drainpipe may be caused by a loose screw or loose gasket. You can tighten screws to stop the leak or replace the gasket with a new one. If neither of these measures works, it’s time to contact a professional plumber. While the leak may be minor, it may be an indication that the internal seal is faulty.

In addition to a leaking gasket, another common source of leakage in garbage disposals is the discharge pipe. This pipe connects the garbage disposal to the sink and is attached to the bottom of the disposal. With regular use, this pipe can become loose or even fail. To tighten this connection, you can use a plumber’s wrench. If you cannot tighten the connection, check the seal between the retaining nut and the discharge pipe. If it’s damaged, you may need to replace this as well.

Replacing a splash guard on a garbage disposal is a fairly simple task, but the process can be tricky. Before starting, make sure you have a good understanding of your garbage disposal manual. Download the manual from the manufacturer’s website if necessary, and follow the instructions carefully. Replacing a garbage disposal splash guard is a simple project, but it is important to follow the instructions carefully and thoroughly.

Start by unplugging your garbage disposal from the power source. This will make it safer for you to work around it. If you can’t unplug the disposal, disconnect the cord from the electrical panel or breaker that serves it. Turn the disposal on again to check if it is plugged in correctly.

Once you have disconnected the garbage disposal, peel off the old splash guard and place the new one on top of it. The new splash guard should fit snugly over the disposal. You can prop it in place with a book or other sturdy object.

If your garbage disposal is not working, you can reset it. Most disposals have a red or black reset button located on the bottom. If this button is popped out, you probably have an overloaded unit. It may need to be repaired. Once you’ve retracted the reset button, turn on the disposal unit again to check if it works.

Before you try to reset the disposal, make sure it is plugged in and running cold water. Once the water starts flowing into the disposal, press the reset button on the disposal and hold it there for 10 minutes. If you still haven’t heard anything after that, it may not work. If you are still unable to reset the garbage disposal, check the circuit breaker in your house.

You may have to reset the garbage disposal if the motor has become overheated or clogged. It can also malfunction if you’ve left the disposal on while it’s not in use. In these cases, it’s best to contact a plumber for assistance.