Home Building – A Complex And Costly Project

Home building is a complex and costly project. But if you have the proper mindset and fluid communication, it can be an exciting experience.

Start by researching local builders in your area. Look at ads in your real estate section of the newspaper or online and ask friends and neighbors for recommendations. If you need assistance, call J&R Construction experts.   

home building

Location

The location you choose for your home will have major impacts on design opportunities, constructability, and costs. It will also affect the daily enjoyment of your home for years to come. Whether you’re building on an island, in the mountains, on the lake, or a golf course, the characteristics of your site will dictate many of your design decisions.

You’ll want to familiarize yourself with the area in which you’re building, including crime rates, school systems, and amenities like grocery stores and gyms. If you plan on having children, it’s important to know about the schools in the area and speak with parents about their experiences.

Building your home close to local resources will save money on transporting materials and labor long distances. However, this may limit your choices in terms of material palette and design. You’ll also need to decide how you will financially support yourself and your family in the new location. This will include determining how much you can afford to pay for your mortgage, as well as other living expenses.

Design

Building a home is an exciting process, where you have the opportunity to shape every aspect of your new dwelling to align with your vision and preferences. However, this can be a complex task that requires the guidance of professionals. Their expertise and industry insights can save you time and money while eliminating potential pitfalls.

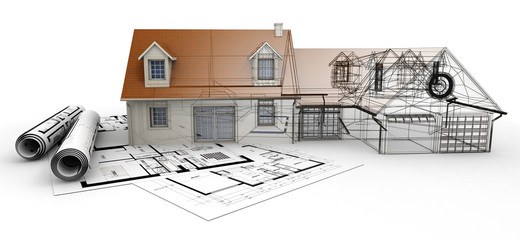
The design stage involves turning your ideas into comprehensive architectural drawings and floor plans, which will serve as the blueprint for the construction of your dream home. This is also an opportunity to explore different materials and finishes that will make your new home stand out from the crowd. It is important to balance your creativity with practicality, taking into account daily routines and family members’ needs. This will ensure that your new home is both beautiful and functional, meeting all your requirements and supporting your lifestyle.

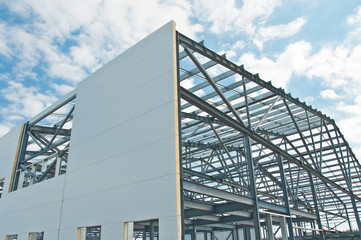
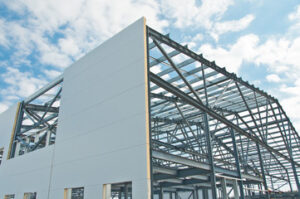
With the availability of affordable building materials and construction techniques, you can now choose between a wide range of styles, sizes, and features. The options for constructing a house have never been greater, from timber-framed structures to steel-and-concrete-frame homes.

While choosing the right design and style for your new house, it is also important to consider your budget and any plans you might have for your property. For example, you might want to add a deck or patio, pool, or other outdoor features. It is important to discuss these options with your builder at the beginning of the project.

Production builders often study consumer trends when designing homes. For example, they know that a growing number of consumers are interested in energy-efficient features such as insulation and Energy Star appliances. However, they must ensure that these features won’t increase the price of their homes beyond what their target market can afford.

The key to success when designing your own home is to ask and answer the right questions. For example, you need to think about the size and layout of your property, as well as the proximity to schools, shopping, and amenities. You should also be aware of any standing neighborhood covenants that might impact your new construction.

Financing

Home building is expensive, and even more so when you add a lot of upgrades. To keep your budget in check, you will need to find the right lender to finance the project. Most lenders recommend that you borrow only up to two times your annual income, and the process for getting preapproved for a construction loan can take several months.

Lenders will want to know your choice of builder, and they will also need to approve your construction plan. They will likely request a signed contract, blueprints, line-item budget, and payment schedule. Depending on your lender, you may be required to have homeowners insurance with builder’s risk coverage while the house is under construction.

Production builders who build homes in communities usually have a model home or series of homes that you can tour to see the style and quality of their work. They pay close attention to consumer surveys, hire mystery shoppers, and comb through economic and demographic data to make sure that the houses they’re building will have a market.

If you’re considering a custom-built house, you’ll have to find a licensed builder who is familiar with your local regulations and will be able to complete the home on time and within budget. Ask for recommendations from friends who have built their own homes or search online to find local builders. The National Association of Home Builders has a directory of certified builders.

If you’re planning to buy a new construction home, you’ll need to secure a lot loan to purchase the land. Most lenders then provide a construction loan that releases periodic disbursements as each phase of the house is completed, and when construction is finished, you’ll convert the construction loan into a permanent mortgage. Some construction loans charge interest only on a variable-rate index, while others use a fixed rate during the entire process and then convert to a fully amortized principal and interest payment. The lender will send a home inspector to verify that the progress is on schedule and that the builder has met specifications. In some cases, the lender will only release a draw when the builder has provided evidence that the work has been completed to the lender’s satisfaction.
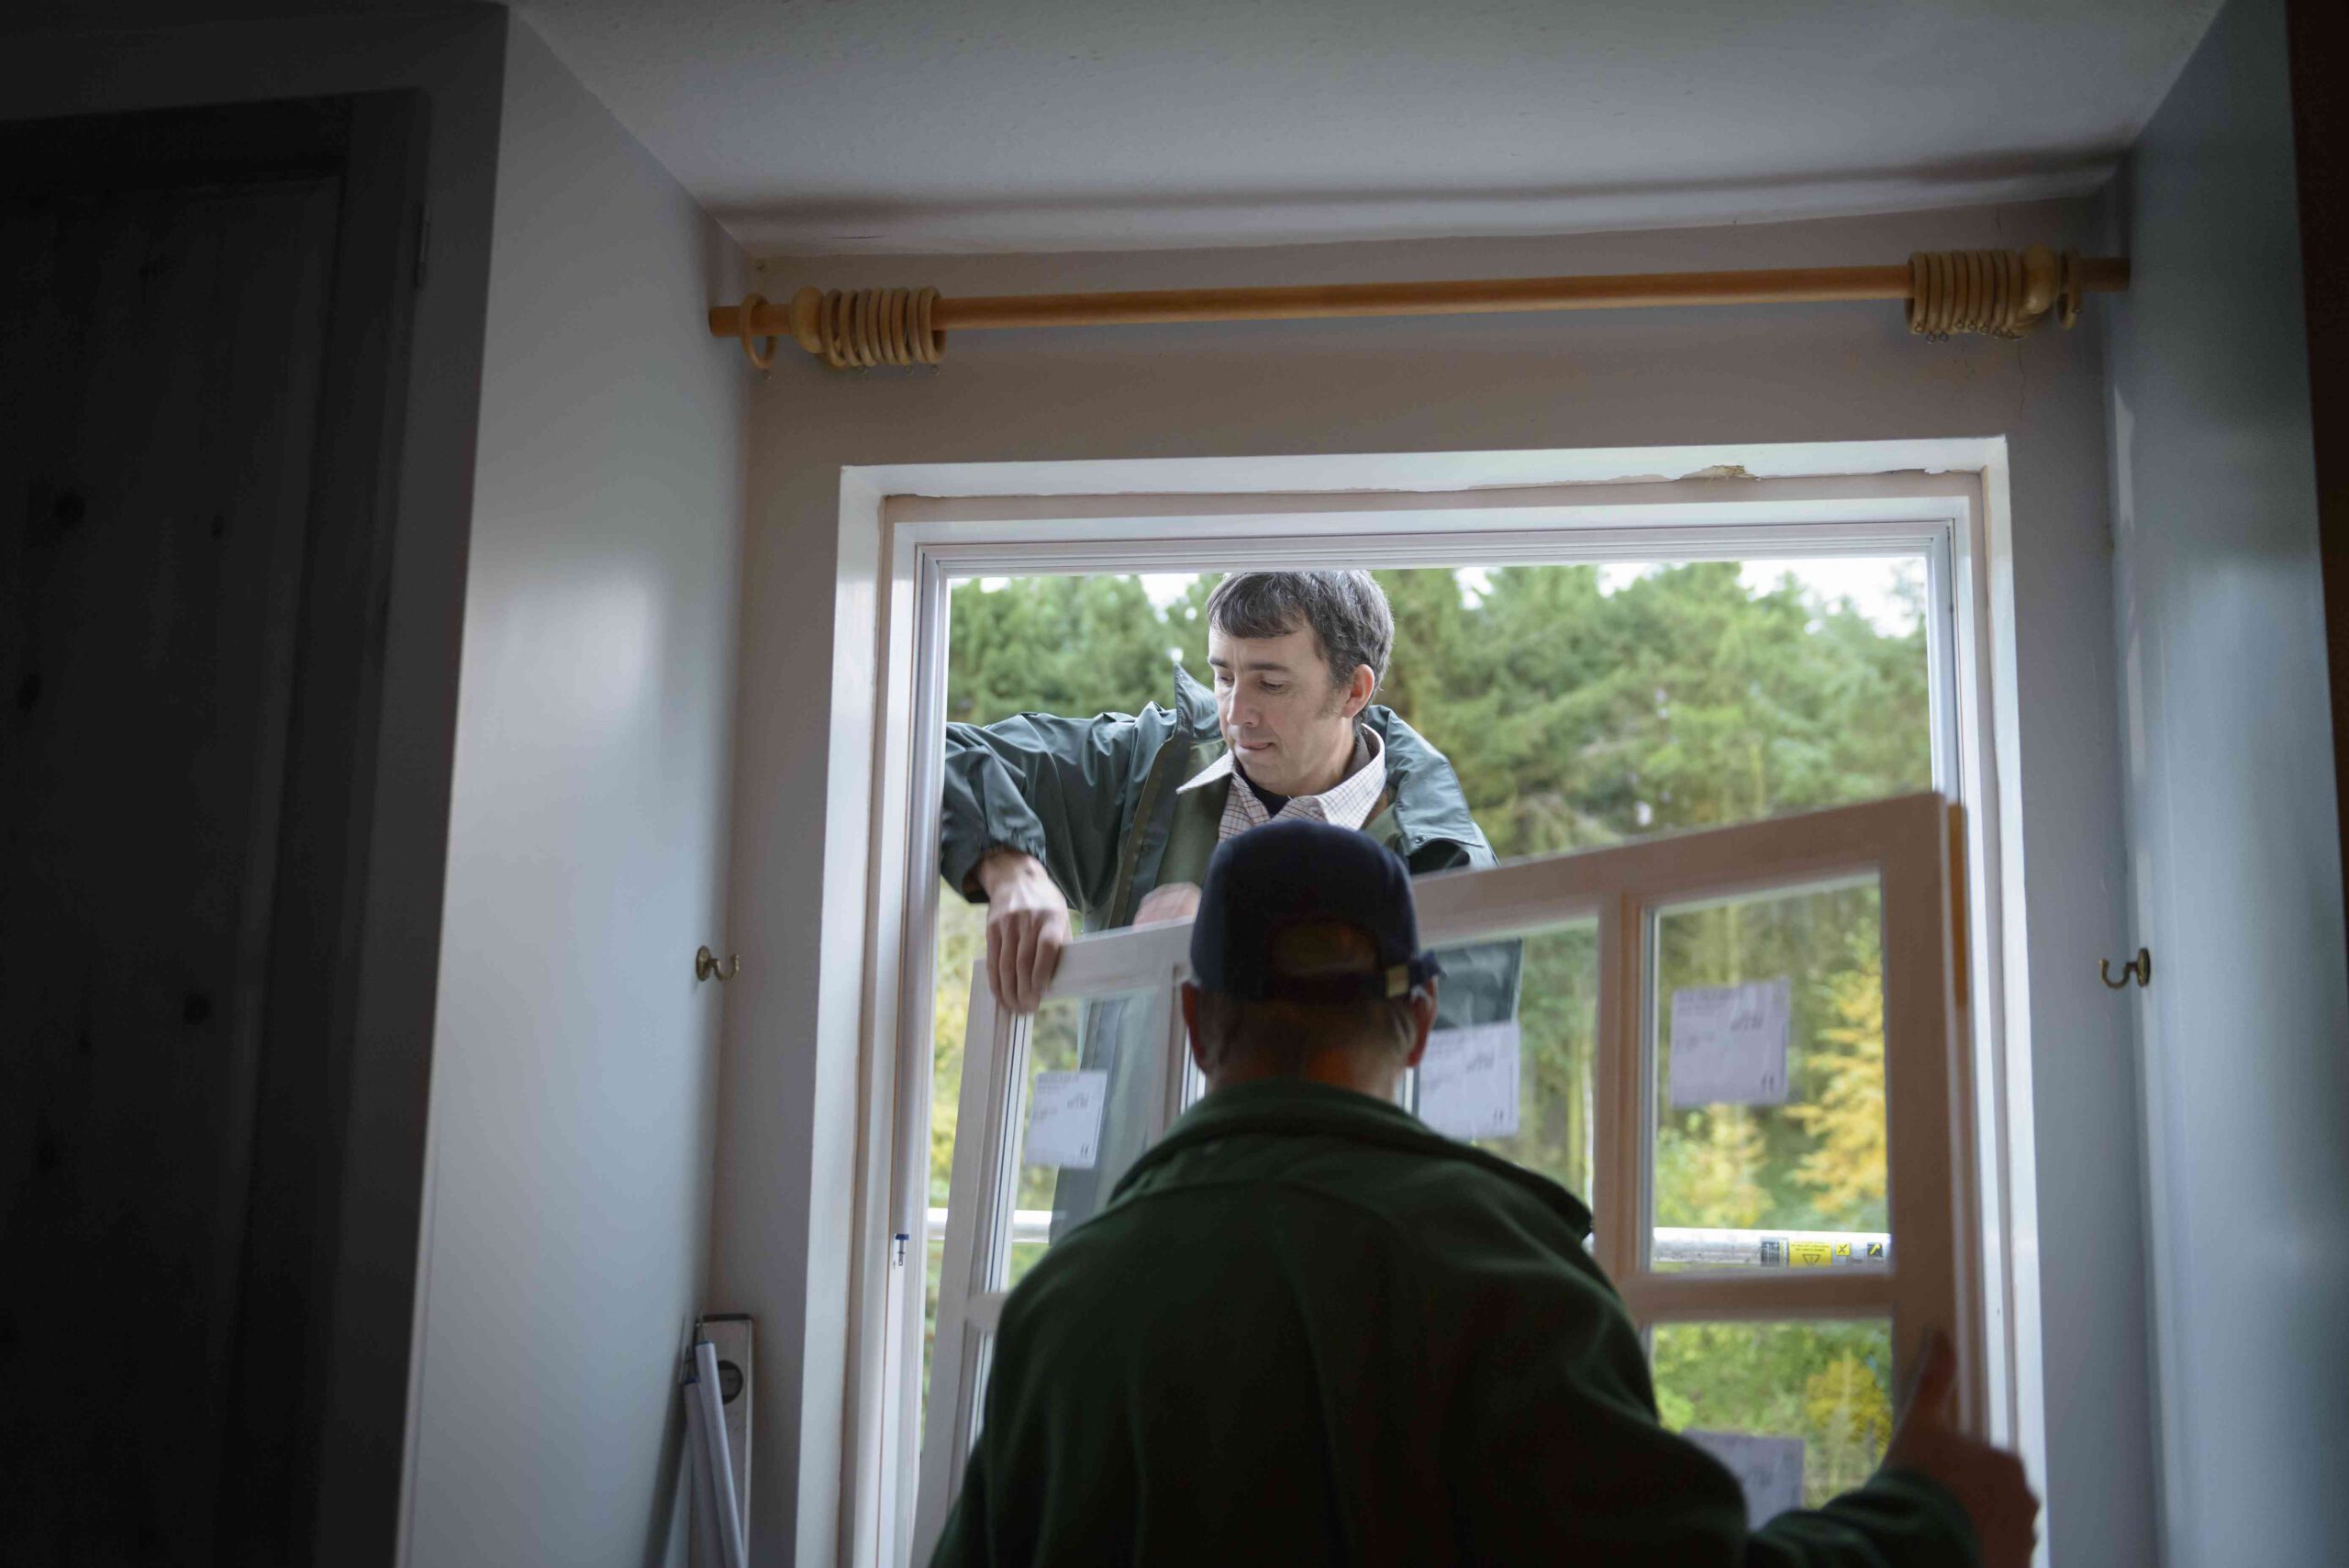
Construction

Building a home involves a series of steps. Construction of any structure takes time, but constructing homes can be particularly laborious due to rising land and materials costs. This is compounded by the fact that demand for new homes often outpaces builder capacity, resulting in long wait times between home tours and closing dates. For these reasons, prospective buyers should understand the construction process before choosing a builder.

The first step is planning and design. This involves working with a design professional to draft plans for the house based on the client’s wishes and requirements. This may take several weeks or months to complete. Once the plans are complete, a contractor for the project will prepare estimates to help the client determine the final budget for the house. During this stage, it is a good idea to use tools that allow designers and homeowners to communicate ideas with compelling visuals that put clients inside the designs, from different angles, at various times of day.

Next, the builder clears the site of brush and debris to make way for the house. They will also grade and drain the lot to prepare it for construction. If the builder owns the land, they may do this themselves, but if they are working with a developer or an owner-builder, they will subcontract these tasks to specialized tradespeople.

Construction can be a complex process, but if the builder has planned and taken into account any known risks, they will minimize the chance of cost overruns. For example, in preparing a quote, the builder will include contingency sums that can be drawn on to cover unforeseen ground works, changes in material or freight costs, and other delays.

It is also a good idea for the builder to have a supervisor on hand to make sure that sustainable design practices and materials are used. Builders may be tempted to expedite the construction of the home to meet client demands, but this can lead to less environmentally friendly alternatives being chosen. A supervisor can check for these things and provide input if needed.

What Does a Plumber Do?

Plumbers Cranford NJ install and repair the pipes and fixtures that provide water, gas, waste disposal, and heating. They also inspect, test, and analyze systems to ensure compliance with regulatory codes.

Plumber

The work can be physically demanding as plumbers often spend their days on their feet and lifting heavy materials. They also need good interpersonal skills to communicate with customers and other construction professionals.

Plumbers install pipes and fixtures that facilitate water and sewage distribution in homes and businesses. Their responsibilities include testing and repairing malfunctioning units, installing new parts, and making sure that all systems are up to code. They also collaborate with other professionals to ensure that plumbing is seamlessly integrated into construction projects. They may also respond to emergency calls for clogged drains or burst pipes.

Plumber duties depend on the type of job at hand and can vary greatly between industries. Some plumbers work exclusively in residential settings, focusing on issues such as leaky faucets, broken toilets, and damaged water heaters. Other plumbers have more extensive industrial experience and may work on larger-scale plumbing projects, such as constructing entire kitchens or bathroom renovations. Regardless of industry, all plumbers must be familiar with local plumbing codes and regulations to ensure the safety of their clients.

Because of the hazardous materials involved in some plumbing tasks, plumbers must take special care to protect themselves from exposure. This may involve wearing protective clothing and using non-toxic cleaning solutions. In addition, they should never put their hands or feet in any contaminated water sources. Plumbers who work with sewage, in particular, are at an increased risk of infection due to the presence of dangerous microbes such as cholera, typhoid, and hepatitis.

Most plumbers pursue an apprenticeship program after graduating from high school or completing a vocational college course. These programs last between four and five years and combine classroom learning with practical hands-on training. They are typically sponsored by trade unions or local contractors, and participants must meet a certain number of educational and on-the-job hours to complete the program.

After completing an apprenticeship, plumbers can apply for licensing in their state or city. This process varies by jurisdiction, but most states require plumbers to pass an exam and have years of relevant experience. In some cases, plumbers may choose to pursue additional certifications to increase their marketability to potential employers or clients. For example, many plumbers become certified in water conservation techniques or are trained to handle natural gas.

Maintenance

Plumbers are responsible for installing, repairing, and maintaining plumbing systems in residential, commercial, and industrial settings. Their work ensures that people have access to clean drinking water, efficient drainage, and sanitary waste management. They often collaborate with other trade professionals to ensure that plumbing systems are integrated seamlessly into building projects and meet all necessary regulations. Plumbers also use their skills to inspect and diagnose problems with pipes, fixtures, and appliances.

In residential settings, plumbers usually work directly with homeowners or tenants to repair plumbing fixtures and pipes. This can include unclogging drains, fixing toilets, and installing sinks, bathtubs, and water heaters. Plumbers in this field must have excellent customer service skills to interact with customers and provide estimates for their services.

Commercial and industrial plumbers usually work on large-scale plumbing systems that serve multiple occupants at once, such as office buildings, hospitals, factories, and power plants. These systems require more complex plumbing equipment and higher-capacity water tanks and pipes. Commercial and industrial plumbers also need to understand how these systems integrate with fire sprinklers and other safety equipment.

Some plumbers specialize in maintenance and service, rather than installation. These plumbers typically work on-call to address plumbing issues that arise outside of regular business hours. They may need to travel between jobs and work on weekends to respond to urgent calls for help. These plumbers need to have strong problem-solving skills to quickly identify and fix issues like leaky faucets, clogged drains, and water heater failures.

Plumbers need to have physical strength and good motor skills to maneuver tools and work in tight spaces. They also need to be comfortable working around bacteria and other hazardous materials, such as sewage, which can cause infectious diseases like cholera, typhoid, hepatitis, and schistosomiasis. In addition to these physical requirements, plumbers must have the mental flexibility to solve complex problems in a short amount of time. They also need to be able to read blueprints and diagrams in order to understand the layout of plumbing systems and make accurate repairs.

Repair

A plumber can repair many different problems, such as clogged drains, leaky faucets, running toilets, and more. They can also install new fixtures, such as sinks and bathtubs. In addition, they can handle sewage issues and replace water heaters. They also have the skills to handle gas pipe repairs and installation.

Plumbing problems are never good, and it’s important to get them fixed as soon as possible. If left unattended, these problems can lead to expensive damage. Many people try to fix their own plumbing issues, but it’s often best to leave it to a professional. This will save time and money in the long run.

Plumbers must be able to understand and interpret blueprints in order to properly install pipes in residential and commercial buildings. They also need to be familiar with local codes and ordinances regarding home construction and plumbing. This is why it’s important to hire a plumber with experience in your area.

Service and repair plumbers are responsible for maintenance and troubleshooting tasks in both residential and commercial settings. They must have excellent problem-solving skills and be able to work with a variety of tools. These plumbers are usually on-call and may work evenings or weekends.

These plumbers are primarily concerned with sewer lines and other waste-management systems. They may be called to inspect and repair a faulty line, or they may be hired to install an entire sewage system. This is a very dangerous job, as the plumbers will be dealing with human waste and disease-causing microbes.

Some common signs that a sewer line is leaking or damaged include strange sounds, a sluggish flow of wastewater, and stains around sinks and toilets. Plumbers can use high-powered water jets to clean sewage lines and repair any damages. They can also remove garbage from septic tanks and drains. While these aren’t as dangerous as working with human waste, they still pose a health risk to plumbers. Therefore, they should wear protective gear when performing these duties. Also, they should be able to handle the stress and physical demands of the job.

Sales

As a plumbing professional, you may have the opportunity to sell other services at each service call. These additional sales opportunities can increase your bottom line and build customer loyalty. However, this requires a high level of integrity and ethics. You should never lie to a homeowner or try to upsell them something they don’t need. You can also use these extra opportunities to promote your business and generate new leads.

People who hire plumbers want a reputable company that will treat them with respect and offer fair prices. In order to do this, plumbers must have an understanding of what the public is looking for in a plumbing professional. They should also make sure they know how to market their services effectively to attract the right clientele.

Plumbers can also work on heating, cooling and ventilation systems, install water filters and purification systems, and inspect sewer and storm drains. They also need to understand national and local building codes, safety laws, and the use of pressure gauges. They may also need to understand copper, PVC, stainless steel and galvanized piping systems.

In addition to these skills, plumbers must be able to communicate clearly with customers and write comprehensive reports. They must be able to analyze the problem and come up with the most cost-effective solution. Additionally, plumbers need to be able to work independently and think quickly. They also need to have the ability to manage their own time, schedule appointments and follow up with customers.

The career of a plumber offers many benefits, including the potential to earn a good living and learn new skills. In addition, plumbers can move up the ladder quickly, earning more money each year as they gain experience and skills. Those who are interested in becoming a plumber should look into local training programs and apprenticeships.

Plumbers are a necessary part of the construction industry, and they play an important role in society by providing clean drinking water and safely removing waste. They can also improve their community’s infrastructure, and they often develop lifelong friendships with other trade professionals. As a result, they can feel proud of the work that they do.

How to Repair Wooden Fence Posts and Rails

Wooden fences develop holes from slow weathering or impact damage, but these are easy to repair with wood filler and paint. Staining and sealing also prolong the life of your R.C Fence LLC.

fence repair

Ask your neighbors if you can access their side of the fence during the repair. This makes the job easier and faster.

A damaged fence post is a common problem that many homeowners face at some point. Usually, it’s due to severe weather conditions like heavy winds that can cause the soil to erode and lead to instability of the posts or wood rot caused by excessive moisture sitting against the post. It can also be due to poor materials used for construction of the fence or casual neglect such as failing to inspect the fence regularly for signs of damage and deterioration.

The best way to fix a damaged fence post is to replace it. However, before replacing it it’s important to evaluate the damage and determine if it makes more sense to repair the existing post instead of replacing it. This is especially true if the existing fence is quite old and showing signs of deterioration or damage.

Generally, if the damage is acute, like being struck by a vehicle or a bad storm, it may make more sense to repair it rather than replace it completely. On the other hand, if it’s chronic and likely to get worse unless addressed, such as wood rot, it may be better to replace it entirely.

Before starting the repair process, it’s a good idea to walk around the entire fence and examine the condition of each post. Be sure to look for cracks and chips in the boards as well as any areas where the fence wobbles or if there are signs of insect infestation like termite holes or trails.

It’s also worth noting if any posts are leaning. If left unattended, this could cause the rest of the fence to eventually fall down or break. It’s also important to check the ground around each post for looseness or if it has been shifted or buried in dirt that is too deep.

Once you’ve assessed the damage, it’s time to gather your tools and materials for the repair job. This should include a hammer, nails/screws, drill with proper bit sizes, saw, wood glue or epoxy, replacement boards/posts/pickets, level tool and wood stain/sealer/protector. It’s always a good idea to wear protective gear, including goggles and gloves.

Broken Rails

The rails that run from post to post across the top and bottom of your wooden fence are critical for its structure. They hold the fence boards and help to keep them in place, so if you notice any damage to these parts of your wooden fencing system, it is important to fix them right away.

While rot is the most common cause of broken rails, impacts can also break them. The best way to prevent this type of damage is by regularly applying wood preservative to the area, which can be purchased at most home improvement stores.

Another way to reduce the risk of broken rails is by increasing inspection frequency and using the most sophisticated testing methods available. This gives railroad companies a better chance of catching cracks before they become major safety hazards. However, this can increase the cost of running a train, so it is important to balance safety and efficiency when making these decisions.

As a result of these technological advances, the number of train derailments has dropped in recent decades. But broken rails remain the leading cause of derailments on mainline tracks, with a great potential for injury and even loss of life.

When a rail breaks, it can cause the wheels of a train to shift off track, causing the train to become unbalanced and possibly derailing. A train derailment can also have catastrophic consequences for the people on and around the trains, as well as the environment. For this reason, railroads are under constant pressure to improve the quality of their rail tracks and to reduce the number of broken rails they have to deal with.

Leaning Posts

Leaning fence posts can be difficult to fix, especially if the post is breaking at the base or has rotted. This can leave the entire stretch of fence in danger of collapse, and it’s important to get to the bottom of the problem and find a long-term solution.

Depending on the cause of the lean, your options may include strengthening the concrete footing, weatherproofing the fence, or changing to a different type of fencing. If the posts are simply unseated or weakened from external forces, however, you can usually straighten them with a few simple steps.

First, step back and examine the extent of the lean. Note its degree and direction, then use a spirit level to ensure the post is level. This will help you decide whether it’s an isolated issue or a symptom of a bigger problem.

If the post is merely unseated, dig around it with a shovel until you hit the concrete base holding it up. This will give you a better idea of how much support the post has and what needs to be done to it to keep it stable.

When digging, try not to remove too much of the concrete from the hole. You may need to re-use it later in the process. Once you’re confident the base of the post is solid, you can dig further to expose a broken or rotting section of the post. If the break is above ground, you’ll need to install a post mender.

Post menders (also known as spikes or anchors) are metal devices designed to be driven into the ground and fastened to a leaning fence post to stabilize it. They’re often used to repair wood fence posts, but they can also be installed on metal ones.

Screw one of these metal anchors to the top of a weak fence post and drive another into the ground below it, using a sledgehammer or other heavy tool. This will help to strengthen the connection between the broken post and its concrete anchor. If the damage to the post is serious, you’ll need to replace it entirely.

Falling Panels

If you find a panel that has fallen off your fence, it’s important to check the rest of the structure. If the rest of the panels are intact, the easiest fix is to re-glue the panel to its frame using Titebond III wood glue. If the frames are exposed, stain the area to match the surrounding wood tone. You can also paint larger areas with acrylics, thinned down with water. You can then blend colors to match the tone and make the repair nearly invisible.

The failure of the panel could have been caused by a number of issues. It appears that the slotted holes for fixings were too close to the edge of the panel, and the sheeting was quite thin. This may have caused material overload if the panel had been subjected to dynamic effects.

How Much Will a Steel Building Cost?

Steel buildings offer many advantages over other types of construction. They are strong, durable and affordable. They can be built on a variety of sites. They are pest-resistant and can reduce maintenance costs.

Steel Building

They also offer great flexibility in terms of spatial design. This includes the option to add rooms or expand them in the future. They are also designed to withstand seismic activity. Click Here for more information.

If you’re in the market for a new steel building, chances are you want to know how much it will cost. Pricing a steel building depends on many different factors, including how you will use the structure and where it will be situated. It’s also important to consider the cost of foundation, site preparation, and other elements that can add up quickly.

Fortunately, you can reduce construction costs by making smart design choices. For example, changing the dimensions of a steel building can significantly lower its overall price. Steel buildings are typically 5-7 percent cheaper than wood or concrete structures. This is partly due to the fact that they require less material.

Another way you can save money is by choosing a metal building with prefabricated components. These are shipped to the site ready to assemble, reducing labor costs. This can be particularly beneficial for industrial projects, where downtime can eat into profits.

Steel is a durable, long-lasting material that is not prone to damage from extreme weather conditions. This makes it an ideal choice for garages, warehouses and other commercial and industrial applications. It can stand up to high winds, heavy snowfall and seismic events without suffering significant structural damage. Furthermore, metal buildings are fire resistant, which can reduce insurance costs.

Additionally, steel is one of the most abundant materials in the world, and manufacturers can produce it using efficient supply chains and distribution strategies. This makes steel a cost-effective option when building a new facility or upgrading an existing structure.

The construction process is also faster with steel. Unlike other materials, steel is prefabricated at the factory and arrives at the construction site ready to erect. This eliminates the need for onsite welding, cutting and reworking, which reduces construction time and labour costs.

Furthermore, steel is light in weight compared to other materials. This allows it to be used with a shallower foundation, which saves on construction and excavation costs. Plus, steel buildings feature clear-span framing, which means they can be expanded later on if necessary. This can be done by adding more floor space or extending the roof.

Versatility

The most popular use for steel building is for warehouses, but they can be used for a variety of other purposes. They’re the perfect solution for industrial facilities such as service garages, auto detailing, towing companies, cold storage warehouses and more. They’re also ideal for agricultural buildings, manufacturing plants and other large-scale commercial operations.

The versatility of steel buildings comes from their modular design and pre-engineered components. These parts are designed to fit together without a lot of time and effort, which saves money in construction costs. It also reduces the chances of human error, which can lead to costly mistakes when using traditional building materials.

In addition to their pre-engineered parts, steel structures are also much quicker to erect than traditional buildings. They can be built in half the time and for a fraction of the cost of other building materials. This means you can get the space you need quickly and start your business or project sooner.

Another reason that steel buildings are so versatile is that they’re more flexible than traditional buildings when it comes to modifying and expanding. Steel construction makes it easy to add new wing or floor layouts, expand existing rooms and install mezzanine floors without the hassle of having to move the entire structure. This level of flexibility is a huge benefit for companies that have to deal with frequent changes in production or equipment needs.

Aside from being highly customizable, steel is also a durable material that’s resistant to extreme weather conditions. Many steel building panels can withstand high winds, heavy snow, lightning and hail. They’re also impervious to pest infestation, making them a great option for people looking for a safe and secure place to live.

These benefits make steel a great choice for anyone who’s looking to build a custom industrial facility, warehouse, office building or any other type of commercial structure. They’re ideal for companies that require a lot of flexibility and are a good investment for businesses that want to grow their customer base, as well as those who need a safe place to store their equipment and supplies.

Resilience

A resilient building is one that can withstand, respond to and recover rapidly from natural disasters like hurricanes, tornadoes, floods, earthquakes and other weather events. The concept of resilience is growing in importance, and specifiers are increasingly being tasked with ensuring that buildings will be able to function before, during and immediately after a disaster strikes. This means that they need to specify materials that are resistant to high winds, water pressure and corrosion.

The type of framing material used in a construction project has a big impact on a building’s resiliency, and cold-formed steel is a good choice for many reasons. Among other things, it is strong, durable and can contribute to a building’s sustainability goals. Additionally, it won’t burn or corrode and is resistant to pests. It also has a high strength-to-weight ratio and ductility, which makes it perfect for resisting seismic and high wind events.

When it comes to building resiliency, the most important thing is to use a design that incorporates several different aspects of a structure’s makeup. For example, a resilient design should include elements like a flexible floor system and redundant connections that can be repaired quickly after a disaster. Additionally, a resilient design should have backup systems to ensure that vital services can continue operating during and after a disaster.

Resilient steel buildings are a smart option because they provide greater protection for the people who live and work in them. Despite being extremely robust, they can be easily adjusted to accommodate changes in a building’s occupancy. This flexibility makes them ideal for a variety of applications, including offices and retail spaces.

Another important feature of resilient steel buildings is their fire resistance. They can withstand the intense heat of a large fire, and they are not easily damaged by fire-resistant coatings. This fire resistance can save lives and reduce the cost of a rebuild.

The resiliency of steel buildings can be further enhanced through the use of pre-engineered trusses and joists. These standardized components can be used to make a building more durable, and they can help reduce costs in the long run. This is because they eliminate the need for labor-intensive onsite construction, and they are usually ready to use within weeks of delivery.

Maintenance

While most people think of steel buildings for garages, shops, warehouses and other industrial facilities, these durable structures can be used for nearly any purpose. For example, they make excellent service industry buildings and are suitable for auto detailing, towing companies, storage, shipping or cold storage warehouses, and even distilleries and breweries. A metal building is also an excellent choice for a manufacturing plant or assembly shop because it has an open floor plan and can be designed to accommodate workflow needs.

In addition, steel is resistant to the normal wear and tear associated with other construction materials, so a metal building will require less maintenance than a traditional wood or brick structure. Steel buildings are also designed to withstand strong weather conditions, including high winds, heavy snowfall and floods. And because they are fire-resistant, your insurance costs may be lower than if you had a wood building.

Steel buildings can be built with a variety of different color panels, so you can choose the design that best suits your tastes and business. However, adding more panels to your building will add to the overall cost because more components and a greater installation effort are involved. You should weigh these additional costs against the long-term benefits of a well-designed and attractive facility.

Another benefit of metal buildings is that they are not susceptible to the damage caused by termites and other pests. These infestations can significantly increase your maintenance costs, especially if you live in an area where termites are common.

While metal buildings do not need much maintenance, you should still perform routine checks to ensure there are no issues that need attention. For example, check that there are no tools or ladders hanging from the outside of your steel building and that nothing is touching the exterior walls or roof. Also, perform a regular inspection to ensure the metal isn’t showing signs of corrosion or discoloration. These simple maintenance tasks can save you money in the long run and prevent future repairs.

The Benefits of Energy-Efficient Replacement Windows

New windows can boost comfort, raise curb appeal and resale value, and require less maintenance. The key is to choose the right windows for your needs.

Replacement Windows

Most homeowners pursue window replacement to enhance energy efficiency and improve aesthetics. While those are great reasons to replace old windows, there are three additional benefits of doing so. However, if you need some assistance from experts, you can contact Your Home Exterior Solutions.

Homeowners who choose to replace their windows with energy-efficient models will save money on heating and cooling costs and enjoy a more comfortable home environment. They’ll also contribute to a more sustainable future by reducing the amount of CO2 released into the atmosphere when heaters and air conditioners are run less frequently.

Advancements in window frame technology have raised the bar when it comes to energy efficiency, making newer models better at preventing heat transfer and blocking drafts. These improvements also make it easier for homeowners to clean and operate their new windows, while adding a boost of style that improves curb appeal.

Energy-efficient windows are a wise investment for any homeowner. By reducing heating and cooling expenses, they’ll pay for themselves in a short period of time. In addition, because they’re crafted to be aesthetically pleasing and easy to maintain, these new windows are marketable assets when it comes time for a homeowner to sell.

The type of glass used in replacement windows makes a difference when it comes to energy efficiency. Choosing windows with low-E coatings and Argon gas-filled panes help reduce thermal transfer. This helps to keep homes warm in winter and cool in summer. It also keeps utility bills lower and reduces fading of furnishings and carpeting caused by direct sunlight.

There are many different styles of replacement windows to consider. Some feature flush flanges that sit neatly against the existing exterior frame. These are ideal for homes with brick or stucco finishes. Others, called insert replacement windows, fit into the existing frame, preserving the original trim and siding. These are most commonly used in older homes with a unique style.

Aside from lowering energy costs, replacement windows can also increase comfort and safety by helping to reduce noise and unwanted outside temperatures. Window replacement options such as casement and double-hung windows offer more ventilation than old single-pane windows.

Another benefit of energy-efficient windows is that they’re better at keeping harmful UV rays out. This protection is important for the health of children and pets. It’s also helpful in reducing fading of furniture, draperies, and other fabrics.

Increased Curb Appeal

When it comes to home curb appeal, the windows and doors of a house play a significant role. They are visible to anyone who walks or drives by, so they are a major part of the overall impression that a person gets about the building. When they are drab, dirty or in poor condition, it can send the message to those who see them that the property is not being well maintained. In contrast, fresh and stylish replacement windows can elicit a more positive reaction from those who view the structure.

Window frames, styles and trim also have a great impact on the appearance of a home, so this is another area in which homeowners can make an improvement with replacement windows. People may choose to match the color and style of the new windows with their existing exterior, or they can go in a completely different direction for a more dramatic effect.

For example, many homeowners who opt to have their windows replaced will switch from sliders to double hung or casement windows to add architectural interest to their home’s exterior. They might even choose specialty shaped windows such as octagons, circles or half moons that help them achieve a more unique look.

Curb appeal is also a major factor in determining how much someone can get for their home when it comes time to sell. This is why it is important to put some effort into the visual aspects of a property – from painting the exterior a new color to reworking the landscaping design. One of the best investments that can be made in boosting curb appeal is installing Pleasanton, CA replacement windows.

Replacement windows are available in a wide range of colors and styles, so they can easily complement almost any type of exterior. In addition, the fact that they are energy efficient can also enhance a home’s value in the eyes of potential buyers. This makes replacing windows a good investment that will pay off in terms of increased home value and lower utility bills.

Increased Home Value

One of the biggest benefits of replacement windows is that they can help to increase your home’s value. This is particularly true if you choose energy-efficient models. Potential buyers will be able to see the savings in their utility bills and may be willing to pay more for a home that is already paying for itself.

New windows can also provide improved security. Old windows that don’t lock properly can allow criminals easier access to the interior of your home. But, new windows that feature better locks and stronger glass can help to improve security in your home and deter crime.

Homeowners often pursue projects like kitchen or bathroom remodeling to add value to their homes, but window replacement offers a much higher return on investment than many other remodeling projects. According to Remodeling Magazine’s 2022 Cost Vs Value Report, upscale vinyl window replacements can provide a return of up to 72.3% at resale.

If you’re thinking of selling your home in the future, then replacing your windows with modern, stylish styles can help to make it more attractive to prospective buyers. They can also open up your home to the outdoors, allowing natural light and fresh air to flow throughout the property.

When it comes to curb appeal, replacement windows offer a wide range of colors, finishes, and shapes that can complement the style of your home. With features like sliding aluminum windows and tilt-and-turn windows, you can easily create a cohesive look that will catch the eye of potential buyers.

While it may be hard to imagine a time when you will want to sell your home, it’s important to maintain your house to keep its value high. Replacing your windows with quality frames that are both energy-efficient and beautiful can help to boost your home’s value and keep it looking its best for years to come. If you’re considering upgrading your windows, contact us today to learn more about the options available. Our experts would be happy to answer any questions you have and help you find the perfect style for your home.

Reduced Maintenance

It’s easy for homeowners to be swayed by claims that replacement windows can save energy. While they might lower a homeowner’s utility bills, those savings are often offset by the cost of replacing rotted frames, broken seals, improper flashing and siding, and missing insulation. It’s also possible that the replacement windows themselves won’t lower energy consumption significantly if they aren’t properly sized for the space.

The right replacement window is one that fits well into the frame, has a tight seal to prevent air infiltration and water leaks, and opens, closes, and locks smoothly. It’s also important that the installation is done by professionals. Poor installation can reduce the value of a new window, and it’s often difficult to fix the problem once it’s occurred.

In addition to a professional installation, choosing replacement windows that are Energy Star certified can help homeowners reduce their utility costs even further. The Energy Star program provides a 30 percent federal tax credit for replacement windows and doors, up to a maximum of $500 per household. The credit is available to homeowners who purchase qualifying windows from an authorized dealer and have them installed by a licensed contractor.

While traditional timber windows require a fair amount of maintenance, uPVC and aluminium replacement windows are designed to be low-maintenance. Unlike timber, they don’t warp or swell in different climate conditions, which means that they require less maintenance to keep them looking and functioning their best.

Another benefit of low-maintenance replacement windows is that they don’t leak or rot as easily as older frames, which can lead to expensive and time-consuming repairs. Leaky windows can allow ice, water, and outside noise to enter the home, robbing the homeowner of valuable energy and possibly leading to mold and mildew. Choosing replacement windows that are insulated with gas between the panes can reduce outside noise, and double- or triple-paned options can also improve the insulation in a home. This can make it easier to enjoy outdoor living spaces, while reducing the need for costly energy bills. In the long run, this can add a lot to the resale value of a home.

How to Properly Install a Vinyl Fence

Vinyl Fence

Vinyl Fence Installation offers security and style to your home or business. They are easy to install and require little maintenance.

Vinyl Fence

Before beginning your project, check deeds for easements and local zoning laws to make sure you can build your fence. This step will also help you determine how much your fence will cost.

Regardless of whether you’re installing a wood or vinyl fence, proper installation is critical. Fences that are not installed correctly can easily be damaged and ripped out by wind or even a simple rainstorm. One of the key steps to a successful install is digging the post holes. Using a post-hole digger or power auger is recommended to save time and effort. This can be rented from many equipment rental companies in your area for about a day’s worth of work.

First, you’ll want to accurately mark the location of your posts, including property lines and any other restrictions on the area. A string line is a great tool for this job, so be sure to use one and stretch it taut from the corners of your fence’s perimeter to each end. If you’re installing a gate, make sure the stakes touch this string line as well.

Once you have the locations marked, dig your posts’ holes with a post-hole digger or a power auger. Typically, the depth of your post holes should be 1/3 of the post lengths. Depending on the soil conditions, it’s also recommended to dig your posts at least 6 inches deeper than needed to help with gravel backfill.

Before you begin digging, it is very important to call your local utility digger’s hotline to have any underground lines marked. Hitting a line while digging can cause expensive damage to your property and even injury or death to you or someone else.

Set Posts

Although vinyl is more durable than wood, it can be damaged by miscalculated hammer swings. Likewise, poorly set posts can create stability problems and shorten the lifespan of the fence.

To avoid this problem, stake out the intended fence line using landscape stakes. After that, tie a string line between each post to determine the proper spacing. Use this string to set the end and corner posts first, then follow it to install the rest of the posts. This technique eliminates the guesswork that often goes into installing fence posts and ensures the vinyl panels fit correctly.

Once you dig the holes, pour in gravel or concrete to add support. For 7’ and 8’ tall vinyl fences, most manufacturers recommend reinforcing corner, end and gate posts with metal inserts or rebar instead of concrete. This adds strength to the fence and helps prevent the deterioration that can occur with traditional concrete.

While it may seem counterintuitive to take a shortcut on the post installation, this step is critical to the final appearance and stability of the vinyl fence. If you skip this step, you could wind up with a wobbly or even collapsed fence. For this reason, it’s best to ask a friend or family member to help you out with the work, especially when pouring and setting posts in concrete. It’s also a good idea to keep a level handy to check each post for straightness.

Pour Concrete

For those who prefer a concrete fence foundation, a vinyl fence can be set in concrete. This option is popular in areas of extreme weather, like Utah, where frost can push concrete posts out of the ground. To install vinyl in concrete, use a concrete mount kit, which includes a form, gravel base, and all the necessary hardware.

Before digging any holes, call the local “Call Before You Dig” line for your area. This will ensure that you do not hit any underground utility lines and cause damage or injury to yourself or others.

Once your holes are dug, add 6 inches of gravel to each post hole before adding the concrete. This will help drain water and allow the posts to stand up straighter in the concrete.

While you pour your concrete, use a form to make sure that the base of the post is sloped away from the post. This will help prevent water from pooling around the posts and rotting them out.

As the concrete sets, check the posts with your level or a string line to make sure that they are plumb. It is much easier to fix a post that is off plumb early in the process than it is to try and correct an entire fence later after the concrete has fully set. Make sure to keep a level handy at every step of the process!

Attach Post Brackets

Just like a wood fence, a vinyl one needs concrete to hold the posts in place. Once the post holes are dug, pour concrete into each of them to form a concrete base. Be sure to stop the concrete about 6 inches below the ground surface so that you can add soil and grass in the future. Use a trough or shovel to shape the concrete at the base of each post so that it slopes down away from the fence and water does not pool there.

Next, install your line posts – the posts that are in between the end posts – according to the style of your vinyl fence and your property lines. Using landscape stakes, mark where the bottom of each line post should go, and then string a level string line from each corner to each of these locations to ensure that all lines are plumb.

You can also add a top rail tie to each of these posts if you want to make it easier for yourself and others to attach the bottom rail to them in the future. Once the top rail is attached, put on post caps to prevent debris and moisture from collecting in them.

It’s important to check with local building regulations and zoning laws before you start to build your fence, so that you can avoid any mistakes that could cost you money or lead to a lawsuit. Some communities require that you use a licensed contractor to build your fence and may have stricter requirements about the materials and height of your fence than other areas. You should also make sure to look at your deed to see if any easements exist on your land, as these can limit where you can put your vinyl fence.

Attach Post Caps

Once you’re confident that your fence posts, bottom rails and vinyl fence panels are level and fitted together correctly, install the top rail and post caps. Follow the manufacturer’s instructions for this part of the job to ensure everything is secure and looks great.

Unlike wood, vinyl does not need staining or painting. It does, however, need periodic cleaning with water and mild detergent to keep it looking pristine. You’ll also need to repair damaged areas on the vinyl as soon as they are noticed. This will help to prevent the problem from spreading to undamaged sections of the vinyl and can extend the life of your fence.

There are a few other important things to consider before beginning your vinyl fence project. First, make sure that you call your local “Call Before You Dig” line to identify any underground lines before digging any holes. This will help to prevent any damage or injuries during your fence building project.

Finally, if you’re installing picket finials on your vinyl fence, be sure to purchase extras in case they get knocked off by lawn mowers, baseballs or anything else. Having spares on hand will allow you to quickly and easily replace them when they are lost. This is a fast, easy and inexpensive way to give your vinyl fence a more finished look. This is especially true if you choose a color that contrasts with the surrounding landscape or house.

Install Panels

After you’ve set the posts, it’s time to install the fence panels. This is a fairly easy task that will likely remind you of those snap-together model kits from your childhood. However, you should follow the manufacturer’s instructions carefully.

Before you begin installing the panels, make sure that your yard has been cleared for your fence’s length and that it has been surveyed to ensure that you can comply with local building regulations. Also, check your deed to see if your property contains any easements. These are areas that another party (such as a utility company) has rights to, and they can impact where you’re able to put your fence.

If you’re planning on adding a gate to your vinyl fence, make sure that you have all of the necessary hardware. Typically, this includes hinges and latches. You might need to have these installed before you actually begin working on the gates or else they will not fit properly.

You should also have extra picket finials on hand, as these are glued to the top of the pickets and can be knocked off by baseballs, footballs, tennis balls, dogs, or even tree limbs. While they are relatively inexpensive to replace, it’s best to keep them handy just in case. Also, you should have a lock on your gate to prevent unauthorized access and robbery. These can be bought from most home improvement stores and are very easy to install.

A Guide to Bathtub Installation

Bathtub installation can feel like a major project, especially when remodeling a full bathroom. Follow this guide to make the job easier and avoid costly mistakes. If your old tub surround is glued to drywall, pull it off with a pry bar and hammer. Add new 2×4 nailers to the studs to support a ledger board where necessary. Visit Website to learn more.

plumbing

If you’re installing a new tub, it’s important to do things correctly. The tub needs to be properly supported so it doesn’t flex when you stand on it, and the plumbing must be connected to it correctly so water doesn’t leak or back up through the wall. If you’re uncomfortable with doing this kind of work, it’s best to hire a professional plumber.

Before you start working on your bathtub installation, make sure the water is turned off and that the old drain plumbing is disconnected. Also, turn off your home’s main water supply line in case there are any problems with the pipes during the process.

Next, lay down a piece of cardboard or plywood over the floor where you’re working to protect it from damage. You’ll need to remove any nails or screws that are anchoring the tub flange to the studs in order to remove and install the new one. It’s also a good idea to cover the surrounding walls with a plastic sheet to prevent any splashes of mortar.

Use a pry bar or screwdriver to loosen and remove any screws or nails holding the flange of the tub in place. After the flange is removed, use a pair of pliers to loosen the drain stopper and linkage. Then, disconnect the trip lever and rocker assembly by turning them counterclockwise to open it. You may need a wrench to do this, depending on the type of drain you have.

Once all the parts are removed, carefully slide the new tub into the alcove. Ensure the bottom lip of the tub is resting on your bed of mortar, and use a level to check that it is straight. If it’s not, you can correct the problem by mixing more mortar and re-laying the lip.

Now, if the manufacturer has given you specific instructions about where to set your tub, use your level to determine that the flange is in the center of the studs. If not, you can adjust the studs by drilling or tapping them in place to make sure they are straight. Now, you can connect the waste and overflow pipe to the drain outlet using plumber’s putty and Teflon tape, which you can tighten with a wrench.

Ledger Board

The ledger board is a critical part of the bathtub installation process because it reduces the amount of weight and stress that is put on the deck framing and tub flange. It also prevents moisture from leaking into the house. If you are installing a new deck, the ledger board should be installed before you dig your footings and set posts. It should also be used as the basic point of reference for determining all the joist framing.

Look at your house and determine if it is sided with traditional lumber frame under clapboard or beveled wood siding. If it is, a small section of the siding will need to be removed so you can attach the ledger board. Once the ledger is in place, it is secured to the house wall using joist hanger brackets and treated deck screws. The joist hanger brackets are pre-bent to fit the inside corner of the ledger and building wall. They are also affixed to the ledger with special 1-1/2″ long double hot-dipped zinc coated joist hanger nails.

Find the height that you want your tub to sit at and mark it on the ledger board. Then mark a line 5.5″ above that on the siding under the ledger. Fold a piece of ledger tape into that spot, remove the release liner and press to adhere.

Screw the ledger board into the joists, being careful not to screw into the flange of the bathtub. Screws should be spaced about 4′ apart or so. Some builders used to use nails for this job, but lag screws are more durable and will hold stronger because of their metal construction.

When you’re done, use Kerdi-Fix to seal the holes that were created. This is important because you want the walls to be as flat as possible for a strong and professional finish.

Check the manufacturer’s specifications for your tub to see if there are specific distances you need to account for on the ledge where the stringer board is mounted. Find the studs in the wall where you marked the ledger and mount a 2×4 to that location. This will be the stringer board that supports the tub. Screw this into the joists with structural lag screws (also called “heavy duty” screws).

Faucets

Before you can set the bathtub in its alcove, you’ll need to install the faucets. You can’t do this until you’ve disconnected the water supply lines (Photo 1). Locate the shutoff valves, usually in an accessible panel in another room or the basement. Turn them off to cut off the water, then take apart your existing shower head, tub spout and handle (Photo 2). Put the parts in a bag or box for safekeeping.

Use a screwdriver to unscrew the faucet hardware from the back of the wall. Identify the type of drain assembly, and get a replacement that matches it. If you’re replacing an old bathtub, you can reuse the spout and drain cover but you’ll need to find or purchase new tub filler and drain shoe.

Once you’ve removed the old faucet assembly, make a mark on each wall stud across the top of the tub flange. This will indicate where to locate the new stringer board. Cut a two-by-four to match the length of the new flange and line it up with the marks on the studs. Screw the board to the studs with exterior grade screws.

Before you place the new tub in its alcove, look down the front of the tub to see if there’s a 1″ gap between the bottom of the tub and your floor below. This will ensure that the tub sits on a solid surface and that the overflow tube and drain shoe fit well.

If you’re using a standard chrome-plated or nickel-plated finish, paint the overflow tube and shoe with enamel paint to match your tub. Otherwise, you can buy matching paint from the tub manufacturer.

If you’re installing a ceramic-disk cartridge faucet, you don’t need to paint it. These high-tech faucets are extremely durable and easy to repair. However, they’re expensive compared to other types of tub faucets, and you might have trouble finding an experienced plumber to repair one if it breaks down. For this reason, many builders recommend that homeowners stick with name-brand products from wholesalers they can trust to stand behind their products.

Drains

A tub needs a drain and, in most cases, a waste-and-overflow (WO) pipe. Using the tub manufacturer’s directions, drill holes for these accessories. Some bathtubs include an insulated support structure on the bottom; in this case, you don’t need to install additional pipes. Otherwise, mix a batch of mortar and spread a thick layer where the main tub drain will be. Be sure to leave several inches clear of the primary drain location. Some manufacturers advise that you drill through the acrylic tub flange and drive screws to the studs, while others recommend hammering nails into the ledger board (which is also called a “stringer”).

If your new tub has an overflow tube and shoe, install these as well. It’s a good idea to lay out a diagram before you start work, since every bathtub is a little different and each has its own specific installation requirements.

Test the water flow and connections by filling the tub and turning on the hot and cold faucets. If everything is fine, you’re ready to move on to the next step.

Before installing the tub, note how the apron — or outer edge — meets the finish floor. If there’s a gap, you can fill it with a silicone sealant.

It’s a good idea to build in an access panel that’s large enough for you or someone working for you to reach the old drain and tub fittings. You’ll need access later to repair or replace these, and you don’t want to be left without a way to get to them in the middle of a project.

Once the ledger board is crewed, it’s a good time to add the drywall to the ceiling around the tub. If you’re not going to tile the walls, it’s especially important that you put a moisture barrier on the drywall and use water-resistant caulking to seal all joints. In some cases, you’ll need to add a sheet of plywood or cement backerboard as an additional water barrier beneath the bathtub.

How to Repair a Crack in Concrete

Concrete repair can be costly, so it’s important to find the right contractor for the job. Make sure the company you choose has experience in the specific project environment and a good safety record.

concrete

The appropriate method for repairing cracks in concrete can be determined by evaluating the cause of damage and the type of crack. Some methods include routing and sealing, using moisture-tolerant epoxy, and injection with polyurethane materials. Visit https://concretecontractorcoloradosprings.com/ to learn more.

When repairing cracks in concrete, contractors need to take several factors into account. First, they should choose a long-lasting repair product that is durable and formulated to adhere to concrete. Oftentimes, crack repair products like epoxy compounds and latex patching materials are available in home improvement stores. However, these types of products are not as long-lasting or formulated to stick to concrete, making them less suitable for professional use. Instead, contractors should choose a product that is formulated to be both long-lasting and durable.

Before applying a concrete repair material, the contractor should prepare the crack by stuffing foam backer rod into it. This step is important to ensure that the crack is completely filled with the repair material. It also provides a foundation for the material and helps prevent the crack from widening or reappearing.

Once the crack is prepped, the contractor should fill it with concrete repair material, following the manufacturer’s instructions. For example, a Quikrete crack repair kit comes with a bag of backer rod and a bucket of pre-mixed concrete. Contractors should follow the instructions closely, as improper mixing can cause the crack repair to fail.

The contractor should then feather the surface of the crack to blend it into the surrounding concrete. This technique is optional but can make the repair look more professional and aesthetically pleasing. Depending on the location of the concrete, some contractors may also want to add an element of creativity to the repair by incorporating a textural element.

Finally, the contractor should clean the area of any debris or loose dirt. This is important because any dirt or debris can prevent the crack repair from bonding to the existing concrete. A small hammer and cold chisel can be used to break away any loose pieces of concrete in the crack.

When choosing a concrete repair material, contractors need to consider the geometry and structural requirements of the project at hand. For example, a concrete crack repair should be able to withstand high compressive strength and resist abrasion. Additionally, the concrete crack repair should be able to flex to accommodate the expansion and contraction of the existing structure. Lastly, the concrete crack repair should be able to withstand thermal stresses from heat generated during curing.

Repairing Holes

The first step in any concrete repair project is to figure out what caused the problem and then do the prep work necessary to ensure the new repairs will last. That means removing any unsound material, cleaning the area to be repaired, and then ensuring the right type of concrete is used for the job at hand.

Contractors can purchase a pre-packaged concrete repair product that contains everything they need to fix the hole, or they can mix their own concrete using a bagged concrete mix. Bagged concrete mixes are available from Quikrete, Sika, Master Builders, MAPEI, and other concrete manufacturers. These products are formulated to meet certain specifications, depending on the geometry and structural requirements of the structure. These materials also comply with the safety regulations governing concrete production, which is important for any contractor.

Once the contractor has decided what type of concrete to use, they should mix it according to the manufacturer’s instructions. This will produce a concrete with a “clay” consistency, which is easier to work with than standard concrete. This is a very important step because if the concrete is mixed too thickly or too thinly, it will not be able to properly bond with the existing concrete.

To prepare the hole for the new concrete patch, a power washer can be used to thoroughly clean the area. This will remove any loose debris or contaminants, such as dirt, oil, or paint, that could weaken the bond between the old concrete and the new concrete. This will allow the patch to adhere to the concrete and provide a long-lasting solution.

After the hole has been cleaned, a rebar sleeve should be placed around the perimeter of the hole. This will prevent the new concrete from settling outside of the hole, which can lead to cracks and other problems in the future. The rebar sleeves can be purchased from most hardware stores or from any concrete supply company.

Once the rebar is in place, the concrete patch can be applied over it. Once the patch is pressed into place, a trowel can be used to smooth it.

Repairing Slabs

Concrete slabs are used for a wide range of building and construction applications. Cracks in a slab can affect its aesthetics and structural integrity. Depending on the severity of the crack, it can also result in water intrusion and damage to adjacent structures or surfaces. The slab may be cracked due to a lack of proper support, improper installation, aging, or environmental factors such as freezing and thawing.

A slab crack is often considered a bad thing, but this is not always the case. Cracks can be a normal part of the building process, especially for concrete that is poured in stages. Builders use control joints and other planned weaknesses in the concrete to allow it to crack as it cures, but if a slab cracks unexpectedly, it could be a sign of a serious problem.

Identifying slab problems can be difficult, especially since most cracks aren’t clearly defined. Some of the most important indicators are the width and length of the crack, how fast it’s growing or spreading, and whether it crazes or forms a web of smaller cracks. If a slab crack is spreading, this is likely a structural problem that needs professional attention.

If a slab is cracked, you should first clean out the area and make sure that there is no loose gravel or debris in the crack. This can prevent the new repair material from bonding with the slab. Then, mix the repair mortar to a stiff consistency and trowel it into the damaged areas, keeping it separate from the adjacent concrete. Blend the patch surface into the slab and roughly round over the edges.

It is recommended to use a prebagged, shrink-compensated mix for concrete repairs. This will help to reduce the risk of early-age shrinkage, which can cause the patch to flake off and break apart. It’s also recommended to use a finisher for the repair area and to texture it to match the surrounding concrete, especially for pavement surfaces.

For slab replacements and repairs over 3 m (10 ft), it is recommended to prepare the longitudinal joints in the existing concrete by drilling and anchoring tie bars or wiggle bolts along the length of the patch. This will provide additional support for the patch, preventing it from separating from the old concrete and allowing for a stronger repair.

Repairing Surfaces

Concrete surfaces need occasional maintenance, especially in areas of heavy use or weather exposure. Whether you’re reforming the edge of a residential concrete step or injecting repair material into cracks, there are some important steps to follow to ensure your work holds up over time.

First, you need to identify the type of damage. Then, choose the proper method of repair. Whether it’s a small crack in a sidewalk or a large hole in an underground garage, you need the right tools and materials for each job.

The first step in repairing surface damage is to expose the fresh concrete that lies along the cracked area. The damaged concrete must be broken up with a hand sledge and chisel or an angle grinder with a masonry blade to remove all the loose material. This is important because if the underlying concrete is brittle or weak, it will not form a strong bond with the new concrete.

After removing all the old material, the exposed concrete should be roughened and cleaned from dust or other contaminants. Then the base concrete should be dampened with water, but not wet enough to cause ponding or wash out the repair material. Finally, the selected patching mortar should be applied to the prepared surface.

Once the patching material is in place, it’s time to add texture and color, if desired. Some contractors prefer a “feathering” technique to lightly blend the patch into the surrounding concrete, while others like to create a more uniform look. In either case, the finished concrete should be smoothed to a sheen and then thoroughly water-cured.

If you’re repairing a deep structural problem, it may be necessary to reinforce the structure with rebar. This will provide greater tensile strength and resistance to shear and bending. A qualified engineer should be consulted for this type of repair. It’s also a good idea to conduct a pull-off test or mock-up on the repaired surface before finalizing the construction design. This will allow you to determine the failure psi of your concrete. This is a critical step in the success of any concrete project.

Choosing a Roofing Contractor

The design process is complex, and a number of factors must be considered. Designers should consider working with a professional roofing contractor or roof consultant. For professional help, call Roofing Columbus GA now!

Roofing

Applied vapor barrier (AVB) and polyisocyanurate are common insulations for built-up roofs. Felt plies are sometimes used in AVB. A layered construction is common for polyiso BURs.

The roof is one of the most important parts of a building because it protects against rain, snow, sunlight, and extremes of temperature. Choosing the right roofing materials can have a huge impact on how well a roof performs and lasts. There are many different roofing materials to choose from, and each has its own advantages and disadvantages. The most popular roofing material is asphalt shingles, which are cost-effective and durable. However, there are also other materials that offer a more unique look. Clay shingles have a beautiful Mediterranean style and are eco-friendly. They are fireproof and non-fading, and they can last up to 50 years. Metal is another option, and it offers superior durability in harsh weather conditions.

The choice of roofing material can have a big impact on the price and quality of a building, as well as its visual appeal. Traditional roofing materials include wood shingles, clay tiles, slate, and metal panels. In recent years, new roofing materials and systems have been developed to provide a greener alternative to traditional materials. For example, solar-powered roofing can reduce energy bills by providing an alternative source of electricity.

Other types of roofing materials include corrugated galvanized iron, copper, aluminum, and terne plate steel (which is stainless and has a tin coating). These are suitable for flat roofs or roofs with a pitch of 3:12 or greater. Some metal roofing is soldered or welded and can be fixed to timber joists or concrete slabs.

Alternatively, PVC membrane is an effective roof covering. It is highly durable and resistant to bacterial growth, industrial chemical atmospheres, root penetration, and extreme weather conditions. It is available in large sheets that minimize the number of seams, which are prone to leaks. It is often heat-welded and can be fixed to either nailable or nonnailable decks. It can be fully adhered or loosely laid and usually lasts 15–30 years.

Other low-slope roof coverings include thatch, which can be made from a variety of plants, including wheat, rye straw, or water reed. It is fire-resistant and can be curved to accommodate a building’s structure.

Installation

Whether you’re installing a new roof or replacing old shingles, a professional is your best choice. Choose a contractor who is credentialed by the product manufacturer and has good local references. Your homeowners’ insurance company may also have a list of recommended contractors.

XPS insulation is an environmentally friendly roofing material that’s sometimes used when re-roofing. It is more durable than polyisocyanurate insulation and does not absorb water like cellulose or fiberglass.

Installing a roof requires a lot of labor. Make sure to hire a crew that will work safely and efficiently.

Often, the most vulnerable areas are chimneys and valleys (where roofing planes meet). Sealing these areas with underlayment or felt paper is critical to preventing leaks. Replacing or repairing flashing, which covers the seams of chimneys and where roof planes meet, can also prevent leaks.

Maintenance

It’s important to keep an eye on your roof throughout the year to ensure that the shingles do not show signs of excessive wear or tear. During this time, you should also inspect the caulking around chimneys and vent pipes to prevent water leaks in these areas.

Another thing to look for is the growth of moss or lichen. These organisms can cause the material beneath shingles to decay, resulting in leaking or mold. Also, if tree branches hang over your house, it is a good idea to trim them on an annual basis to protect the structure and prevent damage during storms.

All maintenance crews are briefed on the needs and systems of the buildings they are servicing on that day’s schedule prior to arriving at your facility. This includes cleaning drains and gutters, pruning all trees and organic growth away from the roof, and re-flashing openings in penetration base flashing.

Repairs

Like painting a room or installing new cabinets, roofing is one of the larger home improvement projects you can undertake. And like those other projects, it’s important to start off right with proper preparation. That means getting into the attic or crawlspace and taking high-res pictures of every inch of that roof. Look for damp stains, any signs of standing water (which can be the first sign of major leaks), any paint that’s peeling, or any other obvious damage. Then check out the shingles, flashing, and valleys for any that are missing, thinning, or damaged.

If you do find damage, it’s time to call in the professionals. And don’t be afraid to have them take off all the shingles to see exactly what kind of condition your roof is in. If you do this, be sure to have a dumpster handy and tarps for the lawn underneath and the foundation plantings or shrubbery on the side.

The last thing you want is for these elements to get wet and start rotting or molding. Roof repairs aren’t always covered by insurance, though the cause of the damage might be—for example, hail or fallen tree branches could qualify as an accident and may be covered.

Some of the most common roof repairs include shingle repair, soffit repair, and dormer or truss repair. The cost of these services will vary depending on your location and the severity of the damage. A professional can help you estimate the cost of these services before they start and help you budget accordingly.

How to Clean Carpets at Home

Carpets act as filters, trapping dust, dirt, and allergens in their fibers. Carpet Cleaning El Dorado Hills CA helps them look better and reduces airborne pollutants, especially for those who suffer from asthma or allergies.

Carpet Cleaning

A professional cleaner uses detergents that are mixed to suit a particular type of fabric and is familiar with the best way to remove specific stains. They also have the equipment needed for hot water extraction, known as steam cleaning.

Dirt and other debris are the scourge of carpets, both residential and commercial. It can stain, discolor, and even degrade fibers. A carpet cleaning machine uses water, heat, and sometimes detergents to loosen ground-in dirt from the pile. Technicians also use specialized tools you won’t find at the hardware store, such as UV lights for spotting pet stains and powerful vacuums to remove the dirt afterward.

Professional cleaners also have access to the most advanced equipment available, such as hot-water extraction machines. This technique uses highly pressurized water heated to a temperature of 200 degrees Fahrenheit or higher to rinse away the most stubborn dirt and stains. The pre-conditioning solution that is applied to the carpet before this process helps to loosen stains and soils that are otherwise too deep in the fibers to be removed by vacuuming alone.

If you can’t afford to hire a professional, try the following tips for removing dirt and other debris from your carpeting:

Vacuum daily (at least once per week) to keep dust, dirt, and other particles from matting down your carpet fibers. This will not only help keep your carpeting clean, but it will also prevent premature wear and tear that could require a costly replacement.

Using doormats at every entrance to your home will help keep some of the dirt and other debris from being tracked onto your carpeting. If you have pets, keep them groomed regularly so that hair doesn’t get trapped in your carpeting.

If you notice that there is no residual dirt visible on the surface of your carpeting but a stain still exists, it may be time to employ a more intensive stain removal treatment. Mix a solution of one quarter teaspoon of detergent and a cup of warm water in a spray bottle. Dampen a cloth with this mixture and then apply it to the stained area. Repeat this blotting process until no more of the stain transfers to the cloth.

If your carpeting still appears stained, it may be necessary to use a more aggressive treatment, such as an enzyme-based carpet pre-spray or carpet shampoo. These chemical treatments typically require a little more effort to apply than traditional carpet cleaners, but they are often more effective at breaking down stains and odors.

Stains

Stains are the number-one reason homeowners turn to professional carpet cleaners. But there are many stain-removal techniques that can be used in the home to keep your carpets looking fresh and clean. The first step to removing a stain is blotting the affected area of the carpet with white paper towels or cloths to absorb as much of the liquid as possible. This can help reduce the chances of color change from the dye in the cloth or paper towel reacting with the cleaning solution.

Next, vacuum the area to remove any physical debris from the stain, and then wet the spot with a rag or sponge with cold water to prevent it from spreading. Once the stain is damp, apply a solution made from a tablespoon of mild dish soap like Dawn, a cup of white vinegar, and two cups of water to the affected area. Apply the solution to the stain using a soft brush or cloth, working from the outside of the stain inward to avoid spreading. Then, blot with a dry washcloth to remove any soapy residue and allow the area to air dry completely.

If the water and dish soap solution doesn’t work, try a solution of hydrogen peroxide and cold water. This works well for older stains, particularly those caused by red wine or pet urine. Start by blotting the affected area with cold water to remove any remaining liquid from the carpet, then use a spray bottle to apply the peroxide solution over the stained area. Use a clean section of blotting cloth frequently, and be sure to use only cold water to avoid the potential for color change from the dye in the washcloth or carpet fibers.

When the stain is removed, you can use a brush or steam vac to revive the carpet pile and then vacuum once more to remove any remaining traces of the stain. To prevent future stains, be proactive in keeping your carpets stain-free by installing doormats at all entranceways and by requiring residents and guests to remove their shoes before entering the house. A good stain prevention plan also includes keeping a bucket of water and a sponge with you at all times to soak up spills as soon as they occur.

Delicate Fabrics

There are many kinds of fabrics, each with its own care requirements. Using the wrong washing technique for delicate fabrics can result in them becoming tattered, discolored, or worn down. Lingerie made with silk or lace, thin knitted jumpers, and scarves are all examples of fabrics that can easily be damaged by a regular wash cycle. There is often a symbol on the label of these garments that will tell you to wash them on the delicate cycle.

You should also be careful when handling and sewing delicate fabrics. It is best to test your thread, needle, and tension settings on a scrap piece of your chosen fabric before you use it to make sure that the materials can withstand the stress of being sewn. If you use a machine to sew your delicate fabric, set the bobbin tension to a low setting. This will prevent the bobbin from catching and pulling on the delicate fabric. It is also best to backstitch for a few stitches when you are completing the seam, but be careful not to do this on too many occasions as it can cause the fabric to stretch and become pulled.

For general stains, you can remove them with household products such as hydrogen peroxide. Simply saturate the stain with the liquid and let it sit for a few minutes before blotting it clean. This solution is also effective for removing blood, wine, and coffee spills.

After cleaning your carpets, you can speed up the drying process by putting aluminum foil squares or wood blocks under all of your furniture. This will keep rust from metal casters and other stains from your furniture from transferring to the damp carpet. It is also a good idea to open windows and run ceiling fans, as warm air will help the fibers of your carpet dry quickly.

For extra help with keeping your delicate fabrics clean, you can purchase various types of stabilizers to use on your projects. These range from tear-away and dissolvable options to spray starch, which works well for projects that need a little support while still being very delicate.

Allergies

Allergies can be triggered by a wide variety of things. These include dust mites, pet dander, and mold spores. Dirty carpets are magnets for these allergens, and they tend to hold them far longer than hard floors do. Allergens can irritate your respiratory system and cause headaches, and they may also trigger conjunctivitis (pink eye). They can also contribute to fatigue.

Allergens can build up in the fibers of most carpeting, including low- and high-pile styles like Berber and Saxony. They can also settle in the padding of the carpet. Allergens can be a problem for individuals with asthma, as they can trigger an attack when breathed in.

Carpet cleaning can help remove the buildup of these irritants and prevent them from circulating in the air. It’s important to vacuum your carpet on a regular basis, and it’s a good idea to use a vacuum with a HEPA filter. The HEPA filter can remove more allergens from the carpet than a standard vacuum bag does.

Other ways to reduce the impact of allergies on your home and family are to install hardwood floors or use area rugs, as these do not collect as much dirt. It’s a good idea to clean area rugs on a regular basis as well.

Using an allergy-rated vacuum cleaner and regularly vacuuming your carpet will greatly reduce the impact of allergens on your health. It is also a good idea to spot-clean stains as soon as they occur. This will help prevent bacteria and mold from growing in them, which can trigger allergic reactions. Investing in an air purifier that has an allergy rating can also pull harmful pollen or mold out of the air before it gets on the carpet, further mitigating the need to deep clean your carpets on a regular basis. Taking these steps will also extend the life of your carpet and keep it looking its best.