Author: Ann Papp

The Difference Between Residential and Commercial Painting

residential painting

Residential painters work solely on residential projects and usually have a smaller team. They also operate within regular business hours. Residential painting contractors have experience working with homeowners and are knowledgeable in ways to protect furniture, floors, and other items during the process. They also understand the importance of communicating with homeowners to understand and fulfill their preferences. For more information, go to https://bunburypaintingservice.com.au/.

Window and Door Painting

A quality window and door paint job can make all the difference. It can transform a plain home into a stunning one. However, unlike walls and furniture, painting doors and windows can be a tricky task to complete.

It requires special techniques, knowledge, and skill to achieve a good outcome. Most importantly, it is important to prep the area before you begin. To ensure that the final result is clean and beautiful, the doors and windows must be cleaned and prepared properly. This process involves scrubbing the surfaces to remove dirt and grime. Afterward, the surface should be dusted to ensure that it is ready for paint.

In addition to cleaning, the surface must be sanded down and primed before it can be painted. Moreover, it is essential to properly prep the frames and sash of the windows as well as any other surfaces that may need work. For example, if the casing is cracked or chipped, it should be filled with wood filler and then sanded down to smooth the transition between the existing finish and the new primer and paint.

Ideally, you should use a high-quality oil-based primer before proceeding with the actual painting. This will provide a better base for the final coat and will allow the finish to last longer than a water-based primer. Besides, the oil-based primer will dry faster and will prevent any peeling of the finish.

Once the primer has dried, it is time to start the actual painting. It is recommended to start with the window casing and then move on to the sash. The casing is the decorative frame that holds in the sash. Usually, it is painted one color while the sash is painted another color.

Once the sash and casing are finished, it is a good idea to cover them with a drop cloth to protect the floors from paint splatter. Then, apply a strip of painter’s tape around the outer edges of the casing where it meets with the wall surfaces. Make sure to avoid overlapping the tape. This will prevent any accidental sloping of the paint when you begin painting the delicate outer edges. Once the tape is removed, it’s important to clean off any spots of paint that have managed to get through. You can do this by using a damp sponge with clear water.
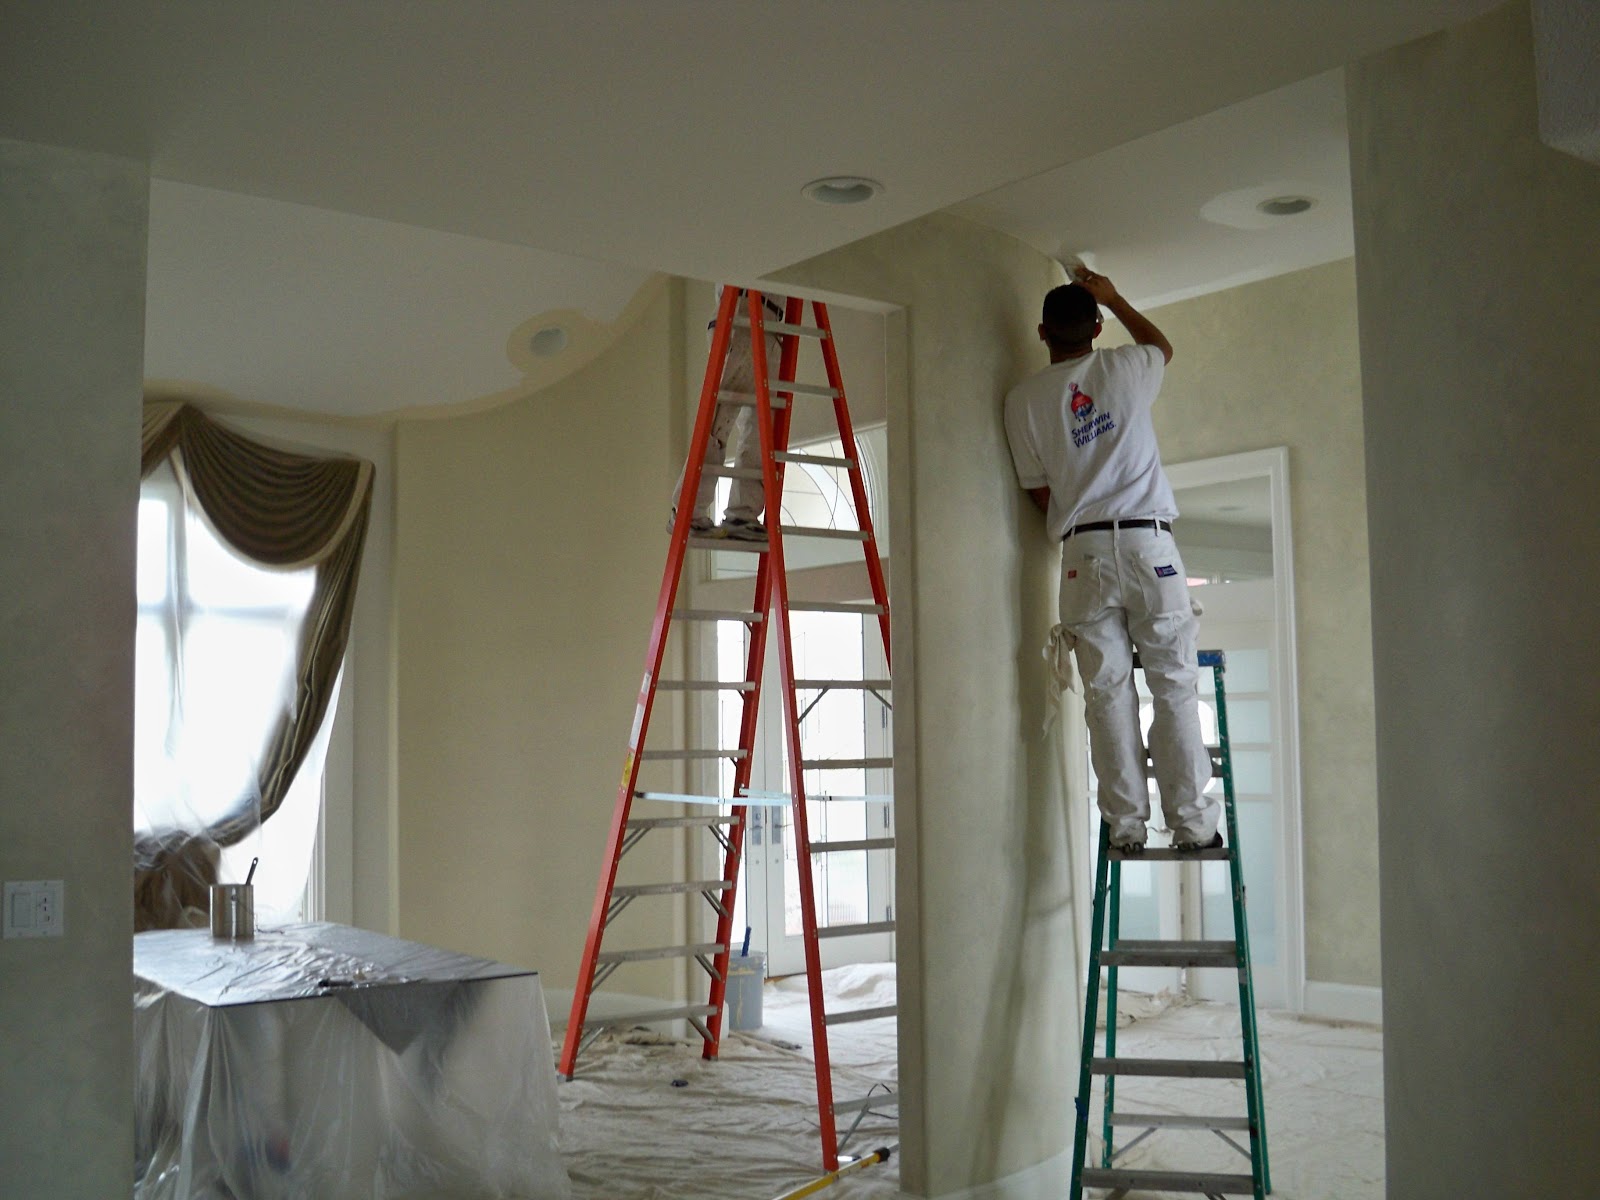
Interior Painting

Residential painting is the practice of improving a single-family home’s interior and exterior with fresh coats of paint. A professional house painter is skilled at transforming spaces into ones that reflect the homeowner’s vision and are well-suited to the way they and their family use the rooms. This type of work is more than just a cosmetic upgrade; it also helps ensure that the structure and surface coatings of a property are protected from damage and maintain a high level of performance.

A residential painting contractor can cater services to a wide range of interior and exterior surfaces. They typically work on walls, ceilings, trim, doors, windows, and other surfaces found within the home. This is in contrast to commercial painters, who generally focus on larger projects like offices, stores, hospitals and more.

It takes a team of experienced painters to complete a successful commercial project and often requires specialized equipment like ladders and scaffolding. This is because commercial properties tend to have much larger square footage and are often used by a large number of people throughout the day. This makes it harder to avoid paint splatters and other issues that may affect the quality of the work.

Both residential and commercial painters have to follow strict regulations to ensure they are working safely and following all building codes. These include using only certain types of paint that are suitable for the work being performed and taking extra precautions when handling or applying these materials.

When it comes to interior painting, residential painters have experience working with a variety of materials and can help homeowners find the right paints for their needs. They can also recommend and execute color schemes that will complement a room’s existing features and fixtures.

Moreover, since homes are frequently used, the painting of interior rooms is usually needed more often than in other areas such as schools or office buildings. In most cases, it is a good idea to refresh the colors of bedrooms and living rooms at least every five to seven years to keep them looking fresh.
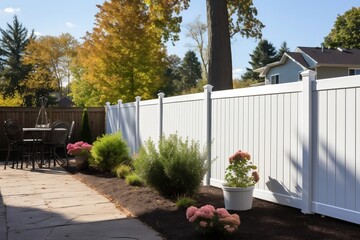
Exterior Painting

Painting a home’s exterior is a big job, one that requires a lot of skill and experience. This is why most people choose to hire professional house painters instead of trying to do it themselves. Residential painters specialize in the interior and exterior painting of single-family homes, so they have the expertise to transform the look of a house and make it look new again. They also know how to prep the surfaces properly before painting, so the paint will last longer.

In addition, residential painters work around their customers’ schedules so they can complete the job when it is convenient for them. This allows the homeowner to be at home while the painting is happening, so they can monitor what is being done and ask questions if needed.

Aside from meeting the needs of homeowners, residential painters also focus on aesthetics and choosing the right colors for their projects. This is because a house is a personal space that the homeowner uses for working, relaxing, and spending time with family members. Therefore, the homeowner has a specific vision for how they want their house to look. Residential painters can meet this need by helping them select the best colors, treating the surface appropriately before painting, and by applying the paint in an efficient and thorough manner.

While most exteriors are painted with traditional oil-based paints, some painters can offer other options that can give a house a unique and different look. These options can include textured-effect paints or mosaic stone paints that create different aesthetic stances on the facade of the building. In addition, some painters can even use different sheens to reflect or absorb light differently on different surfaces.

While the differences between commercial and residential painting are significant, there are some similarities as well. Both types of painters can use various tools to clean the surfaces they’re painting, but commercial painters usually have a more extensive toolbox. This includes power washers, scrapers, sanders, and other equipment that help them clean and prepare the surface for painting. They can also offer a variety of coatings that provide more protection and durability than conventional paints.

Commercial Painting

Homeowners and painting contractors often assume that residential and commercial painting are the same thing, but this is not always true. Although both services focus on bringing beauty and functionality to structures and surfaces, the two differ based on project size and scope. For example, commercial painting projects are usually larger in scale than residential ones and require specialized equipment and materials. Additionally, commercial paints tend to be heavier and more durable than residential paints.

Aside from these differences, residential and commercial painting contractors also have different skillsets and experience. Residential painters are skilled in communicating with homeowners to ensure that their vision for their home is met throughout the painting process. Additionally, they are knowledgeable in ways to protect furniture and other valuables while the work is being done.

Commercial painters, on the other hand, have much more experience working with a variety of textures and surfaces. They know how to prepare and apply a variety of commercial-grade paints, primers, and coatings to surfaces such as concrete, marble, fiberglass, metal, and reinforced plastic. They also understand how to comply with various regulations when it comes to safety in the workplace.

Because of the specialized and more demanding nature of their job, commercial painters may need to be licensed in order to work on specific projects. They must also be prepared to meet strict deadlines. Additionally, if they are required to use specialized equipment on a particular project, then they must be trained in how to properly operate that equipment.

Whether you need to get a room painted or your entire building, a qualified residential and commercial painting contractor is the best way to achieve the results that you are looking for. With the right experience and expertise, you can trust that your property will look great for years to come! Contact a local painting contractor today to learn more about their services. They will be able to provide you with a free estimate and consultation. You can then determine if they are the best fit for your project.

What Skills Do Electric Contractors Need?

An electric contractor takes on bigger projects than an electrician would. This includes creating electrical blueprints and serving as the point of contact for vendors and owners.

Electric contractors are professionals who specialize in the installation, maintenance, and repair of electrical systems in residential, commercial, and industrial buildings. Play a crucial role in ensuring that electrical systems are safe, efficient, and up to code.

electric contractor

They also offer a wider range of services, including backup power, wireless network, data, and voice/video systems. But what exactly sets an electric contractor apart from a regular electrician?

Safety

Whether working on a new construction project or upgrading existing structures, the electrical contractor must follow safety procedures. This can reduce the risk of accidents and injury to workers, as well as protect the structure from damage and fires caused by faulty wiring.

Electricians and their subcontractors are at the most risk for electrocution on a worksite. However, any construction worker who comes into contact with electricity may be injured. The most common causes of electrical injuries are direct contact with overhead power lines, overheated circuits, and faulty tools. Electrical contractors should follow the most up-to-date safety standards and procedures to prevent these accidents from occurring.

One of the most important duties of an electrical contractor is to perform an on-site survey to identify potential safety hazards. They should also inspect all equipment before beginning any work. They should use a site plan to mark the location of each hazard so that other crew members can be aware of it and take extra precautions.

Another important safety measure is to keep all electrical equipment away from water. If a power tool or piece of equipment falls into the water, it should be switched off before it is removed from the water. If the equipment cannot be immediately switched off, it should be marked as Out of Service.

It is also important to avoid overloading circuits, as this can cause them to overheat and potentially start a fire. An electrical contractor should always use multiple circuits to distribute the load of electric power. They should also make sure that all wires are properly insulated and covered to prevent accidental contact with them.

Finally, an electrical contractor should ensure that all power tools are in good condition and have been inspected by an electrician. They should never clean electrical equipment with water, as this can be deadly. They should also make sure that all electrical cords are plugged into ground-fault circuit interrupters (GFCIs), which can help to prevent accidents from occurring. GFCIs are especially useful on construction sites where many people are constantly using extension cords and other electrical equipment.

Experience

Electrical contractors have a lot of experience in the field. They have a wide range of skills and can work in any environment. They also have a good understanding of safety standards. An electric contractor needs to have a lot of experience to meet project demands. This will ensure that the job is completed safely and promptly.

One of the most important skills for an electric contractor to have is attention to detail. This is because they often work with dangerous equipment and need to be able to notice any mistakes that could cause harm. They also use their attention to detail when planning complex electrical projects, such as wiring a large building.

Communication is another important skill for an electric contractor to have. They frequently need to communicate with clients and other workers to complete their work. They use verbal communication to explain their work and give feedback to others. They also use written communication to send emails and correspondence with their clients.

Many electrical contractors have a wide variety of skills, including the ability to work with computer hardware. They use these skills when planning their projects, creating visual representations of their work, and completing administrative tasks like managing employee payroll or tracking expenses. They also use their computer knowledge to help them troubleshoot problems on the job site.

Electricians are required to obtain a license before they can start working on projects. Licensing requirements vary by state, but they generally require several years of experience and successful completion of an exam. Many electricians get their licenses by completing an apprenticeship program or attending a vocational school. In addition, they may choose to join a trade association or an organization that offers continuing education and training.

Licenses

Having verifiable experience as an electrician is a major requirement for getting an electrical contractor license. Typically, states require between 6,000 and 8,000 hours of work experience before a candidate can take the exam to become licensed. Experience can be gained through full-time education or a combination of both. Some schools offer courses that can be substituted for some of the required experience.

Most cities and counties require that an electric contractor obtain a permit for installations, replacements, or repairs within commercial or residential structures. These permits can be obtained through local government offices or electrical boards. Failure to secure a permit can result in civil penalties, which vary by state and may include fines of up to $5,000 per violation.

Some electrical contractors choose to pursue national certifications, which can be beneficial for gaining new business opportunities. While these national certifications are not required by most states, they can demonstrate a higher level of knowledge and proficiency in specific areas of the electrical industry. Depending on the certification, some electrical contractors can also receive additional benefits and perks from employers or clients, such as discounted rates.

In addition to securing a license and obtaining a permit, electrical contractors need to comply with all state and local business regulations. Failure to follow these rules can lead to civil penalties that vary by state, and in some cases, an entire electrical licensing business could be revoked or suspended.

During the licensing process, electrical contractors will need to provide personal and financial information. They must also submit a background investigation report to the licensing and examination department. Some state requirements are more strict than others, including a minimum amount of work experience or schooling. In some cases, an electrical contractor can get a waiver for these requirements by passing a special exam. In most cases, however, a high school diploma is the minimum educational requirement for an electric contractor.

Electric contractors must be licensed and insured to practice their profession. They undergo extensive training and education to acquire the necessary skills and knowledge. They must also stay up to date with the latest advancements in electrical technology and regulations to provide the best service to their clients.

Personality

Whether working independently or with an established organization, an electric contractor needs excellent communication skills. This is because you will be interacting with many different people on job sites, including managers, contractors, architects, and crews. It is also important for you to write your ideas and thoughts, as well as comprehend written materials. Without this, you may not be able to get your work done correctly and could even put others in danger.

A good electrician is also a person who can think outside of the box and come up with creative solutions to problems. In addition, they are typically attentive to detail and enjoy figuring out mechanical things. This type of personality is referred to as an ISTP by the personality test.

Another trait of a good electrician is the ability to keep their emotions in check and stay focused on the job at hand. This is because there are often when you are dealing with dangerous situations that require you to stay calm and act quickly. Ultimately, a reliable electrical contractor is someone you can trust to do the right thing and take the necessary steps to ensure everyone’s safety.

In addition to new construction, electric contractors also handle electrical upgrades and renovations. They may be called upon to upgrade outdated electrical systems, install new appliances or fixtures, or rewire a building to meet changing needs. These projects require careful planning and coordination to minimize disruptions to the occupants of the building.

Maintenance and repair are also essential aspects of an electric contractor’s job. They regularly inspect electrical systems to identify any potential issues and perform routine maintenance to keep them running smoothly. In the event of an electrical problem, such as a power outage or faulty wiring, electric contractors are called upon to diagnose and fix the issue. They have the knowledge and tools to troubleshoot electrical problems and ensure that the system is restored to proper working order.

In conclusion, electric contractors are highly skilled professionals who play a vital role in the construction, maintenance, and repair of electrical systems. Their expertise ensures that electrical systems are safe, efficient, and reliable, making them an essential part of any building project.

How to Properly Install a Vinyl Fence

Vinyl Fence

Vinyl Fence Installation offers security and style to your home or business. They are easy to install and require little maintenance.

Vinyl Fence

Before beginning your project, check deeds for easements and local zoning laws to make sure you can build your fence. This step will also help you determine how much your fence will cost.

Regardless of whether you’re installing a wood or vinyl fence, proper installation is critical. Fences that are not installed correctly can easily be damaged and ripped out by wind or even a simple rainstorm. One of the key steps to a successful install is digging the post holes. Using a post-hole digger or power auger is recommended to save time and effort. This can be rented from many equipment rental companies in your area for about a day’s worth of work.

First, you’ll want to accurately mark the location of your posts, including property lines and any other restrictions on the area. A string line is a great tool for this job, so be sure to use one and stretch it taut from the corners of your fence’s perimeter to each end. If you’re installing a gate, make sure the stakes touch this string line as well.

Once you have the locations marked, dig your posts’ holes with a post-hole digger or a power auger. Typically, the depth of your post holes should be 1/3 of the post lengths. Depending on the soil conditions, it’s also recommended to dig your posts at least 6 inches deeper than needed to help with gravel backfill.

Before you begin digging, it is very important to call your local utility digger’s hotline to have any underground lines marked. Hitting a line while digging can cause expensive damage to your property and even injury or death to you or someone else.

Set Posts

Although vinyl is more durable than wood, it can be damaged by miscalculated hammer swings. Likewise, poorly set posts can create stability problems and shorten the lifespan of the fence.

To avoid this problem, stake out the intended fence line using landscape stakes. After that, tie a string line between each post to determine the proper spacing. Use this string to set the end and corner posts first, then follow it to install the rest of the posts. This technique eliminates the guesswork that often goes into installing fence posts and ensures the vinyl panels fit correctly.

Once you dig the holes, pour in gravel or concrete to add support. For 7’ and 8’ tall vinyl fences, most manufacturers recommend reinforcing corner, end and gate posts with metal inserts or rebar instead of concrete. This adds strength to the fence and helps prevent the deterioration that can occur with traditional concrete.

While it may seem counterintuitive to take a shortcut on the post installation, this step is critical to the final appearance and stability of the vinyl fence. If you skip this step, you could wind up with a wobbly or even collapsed fence. For this reason, it’s best to ask a friend or family member to help you out with the work, especially when pouring and setting posts in concrete. It’s also a good idea to keep a level handy to check each post for straightness.

Pour Concrete

For those who prefer a concrete fence foundation, a vinyl fence can be set in concrete. This option is popular in areas of extreme weather, like Utah, where frost can push concrete posts out of the ground. To install vinyl in concrete, use a concrete mount kit, which includes a form, gravel base, and all the necessary hardware.

Before digging any holes, call the local “Call Before You Dig” line for your area. This will ensure that you do not hit any underground utility lines and cause damage or injury to yourself or others.

Once your holes are dug, add 6 inches of gravel to each post hole before adding the concrete. This will help drain water and allow the posts to stand up straighter in the concrete.

While you pour your concrete, use a form to make sure that the base of the post is sloped away from the post. This will help prevent water from pooling around the posts and rotting them out.

As the concrete sets, check the posts with your level or a string line to make sure that they are plumb. It is much easier to fix a post that is off plumb early in the process than it is to try and correct an entire fence later after the concrete has fully set. Make sure to keep a level handy at every step of the process!

Attach Post Brackets

Just like a wood fence, a vinyl one needs concrete to hold the posts in place. Once the post holes are dug, pour concrete into each of them to form a concrete base. Be sure to stop the concrete about 6 inches below the ground surface so that you can add soil and grass in the future. Use a trough or shovel to shape the concrete at the base of each post so that it slopes down away from the fence and water does not pool there.

Next, install your line posts – the posts that are in between the end posts – according to the style of your vinyl fence and your property lines. Using landscape stakes, mark where the bottom of each line post should go, and then string a level string line from each corner to each of these locations to ensure that all lines are plumb.

You can also add a top rail tie to each of these posts if you want to make it easier for yourself and others to attach the bottom rail to them in the future. Once the top rail is attached, put on post caps to prevent debris and moisture from collecting in them.

It’s important to check with local building regulations and zoning laws before you start to build your fence, so that you can avoid any mistakes that could cost you money or lead to a lawsuit. Some communities require that you use a licensed contractor to build your fence and may have stricter requirements about the materials and height of your fence than other areas. You should also make sure to look at your deed to see if any easements exist on your land, as these can limit where you can put your vinyl fence.

Attach Post Caps

Once you’re confident that your fence posts, bottom rails and vinyl fence panels are level and fitted together correctly, install the top rail and post caps. Follow the manufacturer’s instructions for this part of the job to ensure everything is secure and looks great.

Unlike wood, vinyl does not need staining or painting. It does, however, need periodic cleaning with water and mild detergent to keep it looking pristine. You’ll also need to repair damaged areas on the vinyl as soon as they are noticed. This will help to prevent the problem from spreading to undamaged sections of the vinyl and can extend the life of your fence.

There are a few other important things to consider before beginning your vinyl fence project. First, make sure that you call your local “Call Before You Dig” line to identify any underground lines before digging any holes. This will help to prevent any damage or injuries during your fence building project.

Finally, if you’re installing picket finials on your vinyl fence, be sure to purchase extras in case they get knocked off by lawn mowers, baseballs or anything else. Having spares on hand will allow you to quickly and easily replace them when they are lost. This is a fast, easy and inexpensive way to give your vinyl fence a more finished look. This is especially true if you choose a color that contrasts with the surrounding landscape or house.

Install Panels

After you’ve set the posts, it’s time to install the fence panels. This is a fairly easy task that will likely remind you of those snap-together model kits from your childhood. However, you should follow the manufacturer’s instructions carefully.

Before you begin installing the panels, make sure that your yard has been cleared for your fence’s length and that it has been surveyed to ensure that you can comply with local building regulations. Also, check your deed to see if your property contains any easements. These are areas that another party (such as a utility company) has rights to, and they can impact where you’re able to put your fence.

If you’re planning on adding a gate to your vinyl fence, make sure that you have all of the necessary hardware. Typically, this includes hinges and latches. You might need to have these installed before you actually begin working on the gates or else they will not fit properly.

You should also have extra picket finials on hand, as these are glued to the top of the pickets and can be knocked off by baseballs, footballs, tennis balls, dogs, or even tree limbs. While they are relatively inexpensive to replace, it’s best to keep them handy just in case. Also, you should have a lock on your gate to prevent unauthorized access and robbery. These can be bought from most home improvement stores and are very easy to install.

The Advantage of House Deck Repair

Some deck repairs are easy for homeowners to do as part of regular maintenance. For example, mildew can be removed with a simple bleach and water wash. Decks should be resealed every one to three years. Sealants protect against extensive wood rot and sun damage. Stains are also available that can help protect against rot while altering the wood’s color.

Deck Repair

If your deck is a major part of the front or back of your home, it will probably be covered by your homeowner’s insurance if it is damaged from a peril like wind, hail or fire. It’s important to consult with a reputable Deck Repair Summerville SC before starting any project to ensure the contractor will provide the best service and quality workmanship.

Over time, a deck’s ledger board can become loose or damaged. This is a major safety issue as it can cause the deck to collapse. A good way to prevent this is by ensuring the bolts and screws that secure it are tight and in good condition. Also, make sure that there is a flashing installed behind the ledger board to keep water from seeping in and rotting it.

Another common issue is a deck that’s starting to slope or lean. This can be caused by a number of different things, including old decking boards that have rotted or by the joists becoming loose from over time due to weather damage. Loose joists can also create safety hazards and can cause people to trip when walking across the deck. Depending on the extent of the damage, it may be best to repair or replace the entire deck instead of just repairing the joists.

It’s important to check the joists regularly for signs of damage or rot. Joists can be weakened by weather damage, insect damage, and even pests. They can also start to decompose from overexposure to moisture and fungus. When this happens, it’s essential to make repairs as soon as possible to ensure that the joists are safe to walk on.

Lastly, it’s a good idea to inspect the deck for any signs of water damage or leaks. This can include looking at the decking and railings, as well as checking the posts and beams. It’s essential to look for any large cracks or damage and to make sure that the beams are firmly attached to the tops of the posts and piers.

It’s also a good idea to check that the joist hangers are firmly attached to the ledger board and beams. These are the metal brackets that hold the joists in place. It’s important to use joist hangers that are made from corrosion resistant materials, such as galvanized steel. In addition, the joist hangers should be staggered to prevent the wood from splitting when the lag screws are driven in.

Loose Railings

The railings on your deck help keep you and your guests safe as they relax outside. Loose railings are a safety hazard and should be repaired as soon as possible to avoid any accidents. They also point to underlying problems that could become serious if left unattended. A professional can help you with these repairs to make sure your deck is as safe as possible.

One common reason for loose deck railings is rot from water. This can occur in the joists or in the posts themselves. The first step in preventing rot is to check your deck railings frequently for signs of water damage, including soft spots or discoloration. Then, you can repair the wood or replace it as needed.

Another way to prevent rot is to use a preservative on the wood after each cleaning. This helps keep moisture and dirt away from the wood and extends the life of your deck. In addition, you can use a pressure washer or power sander to remove any debris and then apply the preservative.

Stairs on a deck are exposed to many different hazards, such as water damage, loose treads, and insect infestation. It’s important to inspect your stairs regularly and keep an eye out for any issues. If the stairs are loose or unstable, it’s best to hire a pro to address the problem right away.

Typically, loose deck stairs are due to a weak connection between the joists and the frame of the deck. This can be caused by improper fasteners, such as nails, or a poor connection between the frame and the railing post. To fix the issue, you should use lag screws or bolts to connect the framing of the deck to the railing post instead of nails.

If your deck is in need of a major overhaul, you may want to hire an experienced contractor. They have more experience with building stable stairs, inspecting joists and frames, and installing customizations. They also have a better idea of what colors and staining options will look good with the rest of the deck.

Pest Damage

When termites invade a deck, they can cause significant damage and may even threaten the structural integrity of the home. If you suspect that your house deck is infested, it is important to have a professional perform a pest inspection and make the necessary repairs. Pest inspectors typically take 30 to 60 minutes to complete an examination, depending on the size and layout of your home and the number of pests present.

Wood rot is another major problem that can cause deck problems, including deterioration of the boards, rails and joists. It usually results from moisture that has built up on the wooden components of your deck. This moisture will eventually allow a fungus to grow and compromise the integrity of the deck structure.

In some cases, a simple repair can be made to damaged boards by adding support. This can significantly simplify and reduce the cost of the repair. Repairs that involve replacing the structural supports are more complicated, but it is still possible to maintain the integrity of your deck while the work is being performed. Before making any repairs to the structure of your deck, it is a good idea to contact a few local contractors for estimates.

Fungus growth can also damage the surface of your deck, but it is not as severe as the rot. The fungus can be removed with a power washer, but if the damage is extensive, it will likely be necessary to remove and replace the affected materials. The area can then be treated with a chemical to prevent further growth.

Another common source of deck problems is damage caused by tree limbs. They may fall due to age or injury, or they can be blown down by storms or high winds. They can leave large holes in the deck, and they often damage joists, rails and steps. It is important to have a professional check the condition of your deck after a tree limb falls on it.

The elements and the daily wear and tear of people walking on your deck can also contribute to its disrepair. Water, salt and sun damage can warp the boards and rot the joists. Rock salt used to melt ice in the winter can cause further damage by attacking and deteriorating the wood. It is important to repair any rotting boards and protect your deck from future damage by staining it regularly.

Water Damage

A house deck that is attached to the home should be inspected regularly for signs of water damage. Water damage can warp boards, rot joists and railings, and break down stairs. It can also attract insects and create a moldy, mildew-ridden mess that can be toxic to pets and humans. A professional inspector can tell you whether the deck is structurally sound and recommend the best course of action for repairing it.

Some repair tasks, such as staining the deck or replacing a few broken rails, are relatively easy for homeowners to do themselves. However, it’s best to have a deck contractor inspect the overall condition of a deck before starting any repairs, especially if there is a lot of work to do. This is particularly true if the deck’s structure needs to be reinforced, such as with new posts or joists.

If your deck has wood rot or insect infestation, it will cost more to repair than a non-infested one. Insects like termites and carpenter bees can destroy a deck by chewing through its joists, beams and boards. The best way to avoid this is to plant plants that deter these pests around the deck.

It’s also a good idea to have a pest control expert inspect the deck every couple of years. In addition, you should plan on cleaning the deck with a power washer or other pressure-washing device every one to three years. This will help keep the wood looking good and prevent it from becoming too soft to support your furniture.

Homeowners should plan on having their deck professionally stained or sealed every two to three years as well. This will protect the wood from weather, salt and sun damage. A sealant will help retain the wood’s natural color, while a stain will give it a darker look.

Benefits of Brick Masonry

Brick Masonry is a form of construction that can be used in various types of structures. It can be used in both indoor and outdoor areas. Learn about the construction methods, properties, and environmental impact of this material. Listed below are some of the benefits of brick masonry. You can use this material to build your next project with confidence.

Brick Masonry

Brick Masonry Charleston SC construction is a method of constructing buildings using bricks. The process involves raising brick walls to true vertical, horizontal, and plumb alignment. Vertical joints between adjacent courses of bricks must be straight, and the top of the brick should be above the bottom of the previous brick. In addition, bricks should be a uniform thickness. When laying bricks, a straight wooden edge with a graduation should be used for guidance. Brick walls must be reinforced with wall ties to resist earthquakes.

The mortar used to bind brick units together is known as “mortar.” A mortar mix is usually made of Portland Cement, lime, and sand. The mix used is specified in the Contract Documents. While some mortar systems are manufactured offsite and then delivered to the Jobsite, most mortar is mixed on-site. The Masonry Contractor is responsible for ensuring the consistency and quality of the mortar mix.

In the next step, the mason will set the first course of blocks with mortar, overlapping the corner blocks. The first course of blocks should not be laid in a full mortar bed. This will give the mason a chance to visually check the block’s fit to the plan. The mason will then string the blocks across the openings and along the foundation. They will also check the blocks for levelness, plumb, and alignment with the foundation.

Brick masonry construction methods require careful planning and preparation. The bricks must be properly aligned, and the grooves and sleeves should be in the right position to prevent leaks and keep the bricks stable. The sand should be cleaned thoroughly and screened. If there is scaffolding involved, a safety net should be provided for each floor of the building.

There are many ways to reduce the environmental impact of brick masonry. One method is to use recycled materials in brick manufacturing. Bricks made from recycled materials are more energy efficient and they are more durable. Bricks are also made with less material, resulting in lower construction costs. Another method is to use low-cost machinery to reduce soil waste.

In addition to recycling, masonry manufacturers are making improvements to their products in order to reduce their environmental impact. Newer masonry products, such as autoclaved aerated concrete, are being developed that provide more insulation and green building value. These advancements are aimed at meeting the challenges of green building standards and energy codes. The industry is also pursuing a reduction of carbon emissions by reducing the energy and fuel used to produce cement.

Another innovative option is to produce brick using fly ash, which is produced in the power industry. The manufacturing process converts fly ash into a valuable material. However, the lack of transparency in reporting and information on the impact of brick makes it difficult to compare products. Even if the information is available, it can be difficult to make a truly informed decision.

Brick masonry is a key part of the built environment. It is a durable and attractive choice. The materials used are naturally sustainable, and clay bricks have a long lifespan and high thermal mass. Moreover, they are often extracted locally. However, despite its advantages, brick masonry is less sustainable than other building materials, and they emit greenhouse gases during its production.

Reclaimed bricks are an increasingly popular choice for brickmakers. They are made from old buildings and can be reused. They are durable and can be made into concrete. They are an excellent alternative to new bricks and can also be used for specific structures outside the house. Recycled bricks can also contribute to the rustic look of a property.

Home Remodeling: Creating a Custom Home

Home remodeling and renovation are terms for projects that change the interior or exterior appearance of an existing house. The term “remodeling” is often used interchangeably, and it describes any changes that are made to a home. If you are considering a home remodeling project, here are some tips to keep in mind from pros at https://www.rosadocustomhomes.com/home-builders-in-ct-3/: home remodeling is not only about making the house look better, but it can also mean improving the property.

home remodeling

Home remodeling can be a good way to add extra space or repurpose an existing room. It can also help make a space accessible and convenient for people. For example, a home renovation can replace an old, outdated garage with a game room. However, a game room can create an unsafe situation if it’s difficult to park a car.

The first step in home remodeling is to determine the reasons why you want to remodel your home. Think about any missing assets and untapped potential in your home. You can get ideas from other remodeling projects to create a new plan. Consider structural changes that will add value to your space, such as adding an extra bedroom or making the master bathroom larger. Once you have identified your reasons for remodeling, you can begin the remodeling process. Once you have your remodeling plan in hand, it’s time to find contractors.

Before starting the remodeling process, it’s important to hire a licensed and insured contractor. If you hire an unlicensed or uninsured contractor, your homeowner’s insurance policy is nullified. Additionally, the contractor becomes your “de facto employer.” It’s therefore important to find a licensed and insured contractor and hire a professional renovation team. A good way to find qualified contractors in your area is to use a free service such as Sweeten, which matches homeowners with qualified contractors.

When considering remodeling your home, consider your needs and budget. For example, if you have a large family, remodeling your home will allow you to accommodate your family’s needs. Or, if you are an empty-nester, remodeling your home can make it easier for you to entertain friends and family. If you want more space to entertain, consider remodeling a spare room into an entertainment room or home office.

Another important factor is timing. Determine when you’d like to start the project and how long it will take for each phase. Make sure you budget for a buffer of time and money so that you can deal with any unexpected problems. You can also reduce costs and eliminate elements that are lower on your priority list. It’s also best to consult multiple contractors, so you can find a team that meets your budget and needs.

Lastly, remember that the outside of your home is as important as the inside. You can update its look by adding a garden or new accent pieces. You can also add decorative elements to the front door or mailbox. You can also add shutters, window boxes, and planters to make the entrance more inviting. Adding new windows, doors, or shutters can also make your home look new.

You can also customize your home by including separate guest quarters. You can use this space for office space, an exercise room, or even an art studio. These spaces will add significant value to your property. They’re also easy to incorporate into the design of your house. They’ll also be an attractive feature when you’re ready to sell your house. In this way, you can maximize your property’s value. This is a great home remodeling idea for anyone who is trying to sell their property.

Another common mistake people make is referring to renovation and remodeling as one and the same. Though both involve changing the look of your home, they are two different concepts and require different techniques. The difference is that renovation involves changing an existing space and making it look brand new. Remodeling is about changing how the room will be used.

When choosing a home remodeling company, make sure to check their licensing. Home remodeling is regulated on a local and state level, and failing to comply with these regulations could lead to serious consequences. Having a license is important because a home remodeler who is not licensed could have trouble recovering payment from a client.