How to Properly Install a Vinyl Fence

Vinyl Fence

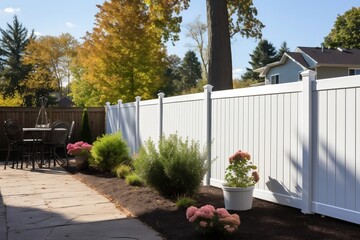
Vinyl Fence Installation offers security and style to your home or business. They are easy to install and require little maintenance.

Vinyl Fence

Before beginning your project, check deeds for easements and local zoning laws to make sure you can build your fence. This step will also help you determine how much your fence will cost.

Regardless of whether you’re installing a wood or vinyl fence, proper installation is critical. Fences that are not installed correctly can easily be damaged and ripped out by wind or even a simple rainstorm. One of the key steps to a successful install is digging the post holes. Using a post-hole digger or power auger is recommended to save time and effort. This can be rented from many equipment rental companies in your area for about a day’s worth of work.

First, you’ll want to accurately mark the location of your posts, including property lines and any other restrictions on the area. A string line is a great tool for this job, so be sure to use one and stretch it taut from the corners of your fence’s perimeter to each end. If you’re installing a gate, make sure the stakes touch this string line as well.

Once you have the locations marked, dig your posts’ holes with a post-hole digger or a power auger. Typically, the depth of your post holes should be 1/3 of the post lengths. Depending on the soil conditions, it’s also recommended to dig your posts at least 6 inches deeper than needed to help with gravel backfill.

Before you begin digging, it is very important to call your local utility digger’s hotline to have any underground lines marked. Hitting a line while digging can cause expensive damage to your property and even injury or death to you or someone else.

Set Posts

Although vinyl is more durable than wood, it can be damaged by miscalculated hammer swings. Likewise, poorly set posts can create stability problems and shorten the lifespan of the fence.

To avoid this problem, stake out the intended fence line using landscape stakes. After that, tie a string line between each post to determine the proper spacing. Use this string to set the end and corner posts first, then follow it to install the rest of the posts. This technique eliminates the guesswork that often goes into installing fence posts and ensures the vinyl panels fit correctly.

Once you dig the holes, pour in gravel or concrete to add support. For 7’ and 8’ tall vinyl fences, most manufacturers recommend reinforcing corner, end and gate posts with metal inserts or rebar instead of concrete. This adds strength to the fence and helps prevent the deterioration that can occur with traditional concrete.

While it may seem counterintuitive to take a shortcut on the post installation, this step is critical to the final appearance and stability of the vinyl fence. If you skip this step, you could wind up with a wobbly or even collapsed fence. For this reason, it’s best to ask a friend or family member to help you out with the work, especially when pouring and setting posts in concrete. It’s also a good idea to keep a level handy to check each post for straightness.
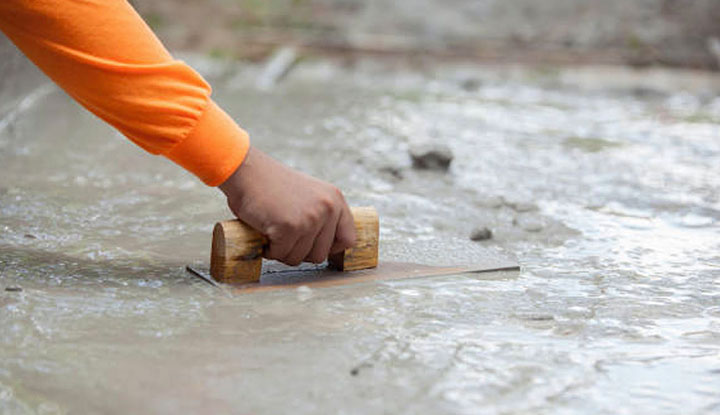
Pour Concrete

For those who prefer a concrete fence foundation, a vinyl fence can be set in concrete. This option is popular in areas of extreme weather, like Utah, where frost can push concrete posts out of the ground. To install vinyl in concrete, use a concrete mount kit, which includes a form, gravel base, and all the necessary hardware.

Before digging any holes, call the local “Call Before You Dig” line for your area. This will ensure that you do not hit any underground utility lines and cause damage or injury to yourself or others.

Once your holes are dug, add 6 inches of gravel to each post hole before adding the concrete. This will help drain water and allow the posts to stand up straighter in the concrete.

While you pour your concrete, use a form to make sure that the base of the post is sloped away from the post. This will help prevent water from pooling around the posts and rotting them out.

As the concrete sets, check the posts with your level or a string line to make sure that they are plumb. It is much easier to fix a post that is off plumb early in the process than it is to try and correct an entire fence later after the concrete has fully set. Make sure to keep a level handy at every step of the process!

Attach Post Brackets

Just like a wood fence, a vinyl one needs concrete to hold the posts in place. Once the post holes are dug, pour concrete into each of them to form a concrete base. Be sure to stop the concrete about 6 inches below the ground surface so that you can add soil and grass in the future. Use a trough or shovel to shape the concrete at the base of each post so that it slopes down away from the fence and water does not pool there.

Next, install your line posts – the posts that are in between the end posts – according to the style of your vinyl fence and your property lines. Using landscape stakes, mark where the bottom of each line post should go, and then string a level string line from each corner to each of these locations to ensure that all lines are plumb.

You can also add a top rail tie to each of these posts if you want to make it easier for yourself and others to attach the bottom rail to them in the future. Once the top rail is attached, put on post caps to prevent debris and moisture from collecting in them.

It’s important to check with local building regulations and zoning laws before you start to build your fence, so that you can avoid any mistakes that could cost you money or lead to a lawsuit. Some communities require that you use a licensed contractor to build your fence and may have stricter requirements about the materials and height of your fence than other areas. You should also make sure to look at your deed to see if any easements exist on your land, as these can limit where you can put your vinyl fence.

Attach Post Caps

Once you’re confident that your fence posts, bottom rails and vinyl fence panels are level and fitted together correctly, install the top rail and post caps. Follow the manufacturer’s instructions for this part of the job to ensure everything is secure and looks great.

Unlike wood, vinyl does not need staining or painting. It does, however, need periodic cleaning with water and mild detergent to keep it looking pristine. You’ll also need to repair damaged areas on the vinyl as soon as they are noticed. This will help to prevent the problem from spreading to undamaged sections of the vinyl and can extend the life of your fence.

There are a few other important things to consider before beginning your vinyl fence project. First, make sure that you call your local “Call Before You Dig” line to identify any underground lines before digging any holes. This will help to prevent any damage or injuries during your fence building project.

Finally, if you’re installing picket finials on your vinyl fence, be sure to purchase extras in case they get knocked off by lawn mowers, baseballs or anything else. Having spares on hand will allow you to quickly and easily replace them when they are lost. This is a fast, easy and inexpensive way to give your vinyl fence a more finished look. This is especially true if you choose a color that contrasts with the surrounding landscape or house.

Install Panels

After you’ve set the posts, it’s time to install the fence panels. This is a fairly easy task that will likely remind you of those snap-together model kits from your childhood. However, you should follow the manufacturer’s instructions carefully.

Before you begin installing the panels, make sure that your yard has been cleared for your fence’s length and that it has been surveyed to ensure that you can comply with local building regulations. Also, check your deed to see if your property contains any easements. These are areas that another party (such as a utility company) has rights to, and they can impact where you’re able to put your fence.

If you’re planning on adding a gate to your vinyl fence, make sure that you have all of the necessary hardware. Typically, this includes hinges and latches. You might need to have these installed before you actually begin working on the gates or else they will not fit properly.

You should also have extra picket finials on hand, as these are glued to the top of the pickets and can be knocked off by baseballs, footballs, tennis balls, dogs, or even tree limbs. While they are relatively inexpensive to replace, it’s best to keep them handy just in case. Also, you should have a lock on your gate to prevent unauthorized access and robbery. These can be bought from most home improvement stores and are very easy to install.

A Guide to Bathtub Installation

Bathtub installation can feel like a major project, especially when remodeling a full bathroom. Follow this guide to make the job easier and avoid costly mistakes. If your old tub surround is glued to drywall, pull it off with a pry bar and hammer. Add new 2×4 nailers to the studs to support a ledger board where necessary. Visit Website to learn more.

plumbing

If you’re installing a new tub, it’s important to do things correctly. The tub needs to be properly supported so it doesn’t flex when you stand on it, and the plumbing must be connected to it correctly so water doesn’t leak or back up through the wall. If you’re uncomfortable with doing this kind of work, it’s best to hire a professional plumber.

Before you start working on your bathtub installation, make sure the water is turned off and that the old drain plumbing is disconnected. Also, turn off your home’s main water supply line in case there are any problems with the pipes during the process.

Next, lay down a piece of cardboard or plywood over the floor where you’re working to protect it from damage. You’ll need to remove any nails or screws that are anchoring the tub flange to the studs in order to remove and install the new one. It’s also a good idea to cover the surrounding walls with a plastic sheet to prevent any splashes of mortar.

Use a pry bar or screwdriver to loosen and remove any screws or nails holding the flange of the tub in place. After the flange is removed, use a pair of pliers to loosen the drain stopper and linkage. Then, disconnect the trip lever and rocker assembly by turning them counterclockwise to open it. You may need a wrench to do this, depending on the type of drain you have.

Once all the parts are removed, carefully slide the new tub into the alcove. Ensure the bottom lip of the tub is resting on your bed of mortar, and use a level to check that it is straight. If it’s not, you can correct the problem by mixing more mortar and re-laying the lip.

Now, if the manufacturer has given you specific instructions about where to set your tub, use your level to determine that the flange is in the center of the studs. If not, you can adjust the studs by drilling or tapping them in place to make sure they are straight. Now, you can connect the waste and overflow pipe to the drain outlet using plumber’s putty and Teflon tape, which you can tighten with a wrench.

Ledger Board

The ledger board is a critical part of the bathtub installation process because it reduces the amount of weight and stress that is put on the deck framing and tub flange. It also prevents moisture from leaking into the house. If you are installing a new deck, the ledger board should be installed before you dig your footings and set posts. It should also be used as the basic point of reference for determining all the joist framing.

Look at your house and determine if it is sided with traditional lumber frame under clapboard or beveled wood siding. If it is, a small section of the siding will need to be removed so you can attach the ledger board. Once the ledger is in place, it is secured to the house wall using joist hanger brackets and treated deck screws. The joist hanger brackets are pre-bent to fit the inside corner of the ledger and building wall. They are also affixed to the ledger with special 1-1/2″ long double hot-dipped zinc coated joist hanger nails.

Find the height that you want your tub to sit at and mark it on the ledger board. Then mark a line 5.5″ above that on the siding under the ledger. Fold a piece of ledger tape into that spot, remove the release liner and press to adhere.

Screw the ledger board into the joists, being careful not to screw into the flange of the bathtub. Screws should be spaced about 4′ apart or so. Some builders used to use nails for this job, but lag screws are more durable and will hold stronger because of their metal construction.

When you’re done, use Kerdi-Fix to seal the holes that were created. This is important because you want the walls to be as flat as possible for a strong and professional finish.

Check the manufacturer’s specifications for your tub to see if there are specific distances you need to account for on the ledge where the stringer board is mounted. Find the studs in the wall where you marked the ledger and mount a 2×4 to that location. This will be the stringer board that supports the tub. Screw this into the joists with structural lag screws (also called “heavy duty” screws).

Faucets

Before you can set the bathtub in its alcove, you’ll need to install the faucets. You can’t do this until you’ve disconnected the water supply lines (Photo 1). Locate the shutoff valves, usually in an accessible panel in another room or the basement. Turn them off to cut off the water, then take apart your existing shower head, tub spout and handle (Photo 2). Put the parts in a bag or box for safekeeping.

Use a screwdriver to unscrew the faucet hardware from the back of the wall. Identify the type of drain assembly, and get a replacement that matches it. If you’re replacing an old bathtub, you can reuse the spout and drain cover but you’ll need to find or purchase new tub filler and drain shoe.

Once you’ve removed the old faucet assembly, make a mark on each wall stud across the top of the tub flange. This will indicate where to locate the new stringer board. Cut a two-by-four to match the length of the new flange and line it up with the marks on the studs. Screw the board to the studs with exterior grade screws.

Before you place the new tub in its alcove, look down the front of the tub to see if there’s a 1″ gap between the bottom of the tub and your floor below. This will ensure that the tub sits on a solid surface and that the overflow tube and drain shoe fit well.

If you’re using a standard chrome-plated or nickel-plated finish, paint the overflow tube and shoe with enamel paint to match your tub. Otherwise, you can buy matching paint from the tub manufacturer.

If you’re installing a ceramic-disk cartridge faucet, you don’t need to paint it. These high-tech faucets are extremely durable and easy to repair. However, they’re expensive compared to other types of tub faucets, and you might have trouble finding an experienced plumber to repair one if it breaks down. For this reason, many builders recommend that homeowners stick with name-brand products from wholesalers they can trust to stand behind their products.

Drains

A tub needs a drain and, in most cases, a waste-and-overflow (WO) pipe. Using the tub manufacturer’s directions, drill holes for these accessories. Some bathtubs include an insulated support structure on the bottom; in this case, you don’t need to install additional pipes. Otherwise, mix a batch of mortar and spread a thick layer where the main tub drain will be. Be sure to leave several inches clear of the primary drain location. Some manufacturers advise that you drill through the acrylic tub flange and drive screws to the studs, while others recommend hammering nails into the ledger board (which is also called a “stringer”).

If your new tub has an overflow tube and shoe, install these as well. It’s a good idea to lay out a diagram before you start work, since every bathtub is a little different and each has its own specific installation requirements.

Test the water flow and connections by filling the tub and turning on the hot and cold faucets. If everything is fine, you’re ready to move on to the next step.

Before installing the tub, note how the apron — or outer edge — meets the finish floor. If there’s a gap, you can fill it with a silicone sealant.

It’s a good idea to build in an access panel that’s large enough for you or someone working for you to reach the old drain and tub fittings. You’ll need access later to repair or replace these, and you don’t want to be left without a way to get to them in the middle of a project.

Once the ledger board is crewed, it’s a good time to add the drywall to the ceiling around the tub. If you’re not going to tile the walls, it’s especially important that you put a moisture barrier on the drywall and use water-resistant caulking to seal all joints. In some cases, you’ll need to add a sheet of plywood or cement backerboard as an additional water barrier beneath the bathtub.

How to Repair a Crack in Concrete

Concrete repair can be costly, so it’s important to find the right contractor for the job. Make sure the company you choose has experience in the specific project environment and a good safety record.

concrete

The appropriate method for repairing cracks in concrete can be determined by evaluating the cause of damage and the type of crack. Some methods include routing and sealing, using moisture-tolerant epoxy, and injection with polyurethane materials. Visit https://concretecontractorcoloradosprings.com/ to learn more.

When repairing cracks in concrete, contractors need to take several factors into account. First, they should choose a long-lasting repair product that is durable and formulated to adhere to concrete. Oftentimes, crack repair products like epoxy compounds and latex patching materials are available in home improvement stores. However, these types of products are not as long-lasting or formulated to stick to concrete, making them less suitable for professional use. Instead, contractors should choose a product that is formulated to be both long-lasting and durable.

Before applying a concrete repair material, the contractor should prepare the crack by stuffing foam backer rod into it. This step is important to ensure that the crack is completely filled with the repair material. It also provides a foundation for the material and helps prevent the crack from widening or reappearing.

Once the crack is prepped, the contractor should fill it with concrete repair material, following the manufacturer’s instructions. For example, a Quikrete crack repair kit comes with a bag of backer rod and a bucket of pre-mixed concrete. Contractors should follow the instructions closely, as improper mixing can cause the crack repair to fail.

The contractor should then feather the surface of the crack to blend it into the surrounding concrete. This technique is optional but can make the repair look more professional and aesthetically pleasing. Depending on the location of the concrete, some contractors may also want to add an element of creativity to the repair by incorporating a textural element.

Finally, the contractor should clean the area of any debris or loose dirt. This is important because any dirt or debris can prevent the crack repair from bonding to the existing concrete. A small hammer and cold chisel can be used to break away any loose pieces of concrete in the crack.

When choosing a concrete repair material, contractors need to consider the geometry and structural requirements of the project at hand. For example, a concrete crack repair should be able to withstand high compressive strength and resist abrasion. Additionally, the concrete crack repair should be able to flex to accommodate the expansion and contraction of the existing structure. Lastly, the concrete crack repair should be able to withstand thermal stresses from heat generated during curing.

Repairing Holes

The first step in any concrete repair project is to figure out what caused the problem and then do the prep work necessary to ensure the new repairs will last. That means removing any unsound material, cleaning the area to be repaired, and then ensuring the right type of concrete is used for the job at hand.

Contractors can purchase a pre-packaged concrete repair product that contains everything they need to fix the hole, or they can mix their own concrete using a bagged concrete mix. Bagged concrete mixes are available from Quikrete, Sika, Master Builders, MAPEI, and other concrete manufacturers. These products are formulated to meet certain specifications, depending on the geometry and structural requirements of the structure. These materials also comply with the safety regulations governing concrete production, which is important for any contractor.

Once the contractor has decided what type of concrete to use, they should mix it according to the manufacturer’s instructions. This will produce a concrete with a “clay” consistency, which is easier to work with than standard concrete. This is a very important step because if the concrete is mixed too thickly or too thinly, it will not be able to properly bond with the existing concrete.

To prepare the hole for the new concrete patch, a power washer can be used to thoroughly clean the area. This will remove any loose debris or contaminants, such as dirt, oil, or paint, that could weaken the bond between the old concrete and the new concrete. This will allow the patch to adhere to the concrete and provide a long-lasting solution.

After the hole has been cleaned, a rebar sleeve should be placed around the perimeter of the hole. This will prevent the new concrete from settling outside of the hole, which can lead to cracks and other problems in the future. The rebar sleeves can be purchased from most hardware stores or from any concrete supply company.

Once the rebar is in place, the concrete patch can be applied over it. Once the patch is pressed into place, a trowel can be used to smooth it.

Repairing Slabs

Concrete slabs are used for a wide range of building and construction applications. Cracks in a slab can affect its aesthetics and structural integrity. Depending on the severity of the crack, it can also result in water intrusion and damage to adjacent structures or surfaces. The slab may be cracked due to a lack of proper support, improper installation, aging, or environmental factors such as freezing and thawing.

A slab crack is often considered a bad thing, but this is not always the case. Cracks can be a normal part of the building process, especially for concrete that is poured in stages. Builders use control joints and other planned weaknesses in the concrete to allow it to crack as it cures, but if a slab cracks unexpectedly, it could be a sign of a serious problem.

Identifying slab problems can be difficult, especially since most cracks aren’t clearly defined. Some of the most important indicators are the width and length of the crack, how fast it’s growing or spreading, and whether it crazes or forms a web of smaller cracks. If a slab crack is spreading, this is likely a structural problem that needs professional attention.

If a slab is cracked, you should first clean out the area and make sure that there is no loose gravel or debris in the crack. This can prevent the new repair material from bonding with the slab. Then, mix the repair mortar to a stiff consistency and trowel it into the damaged areas, keeping it separate from the adjacent concrete. Blend the patch surface into the slab and roughly round over the edges.

It is recommended to use a prebagged, shrink-compensated mix for concrete repairs. This will help to reduce the risk of early-age shrinkage, which can cause the patch to flake off and break apart. It’s also recommended to use a finisher for the repair area and to texture it to match the surrounding concrete, especially for pavement surfaces.

For slab replacements and repairs over 3 m (10 ft), it is recommended to prepare the longitudinal joints in the existing concrete by drilling and anchoring tie bars or wiggle bolts along the length of the patch. This will provide additional support for the patch, preventing it from separating from the old concrete and allowing for a stronger repair.

Repairing Surfaces

Concrete surfaces need occasional maintenance, especially in areas of heavy use or weather exposure. Whether you’re reforming the edge of a residential concrete step or injecting repair material into cracks, there are some important steps to follow to ensure your work holds up over time.

First, you need to identify the type of damage. Then, choose the proper method of repair. Whether it’s a small crack in a sidewalk or a large hole in an underground garage, you need the right tools and materials for each job.

The first step in repairing surface damage is to expose the fresh concrete that lies along the cracked area. The damaged concrete must be broken up with a hand sledge and chisel or an angle grinder with a masonry blade to remove all the loose material. This is important because if the underlying concrete is brittle or weak, it will not form a strong bond with the new concrete.

After removing all the old material, the exposed concrete should be roughened and cleaned from dust or other contaminants. Then the base concrete should be dampened with water, but not wet enough to cause ponding or wash out the repair material. Finally, the selected patching mortar should be applied to the prepared surface.

Once the patching material is in place, it’s time to add texture and color, if desired. Some contractors prefer a “feathering” technique to lightly blend the patch into the surrounding concrete, while others like to create a more uniform look. In either case, the finished concrete should be smoothed to a sheen and then thoroughly water-cured.

If you’re repairing a deep structural problem, it may be necessary to reinforce the structure with rebar. This will provide greater tensile strength and resistance to shear and bending. A qualified engineer should be consulted for this type of repair. It’s also a good idea to conduct a pull-off test or mock-up on the repaired surface before finalizing the construction design. This will allow you to determine the failure psi of your concrete. This is a critical step in the success of any concrete project.

Choosing a Roofing Contractor

The design process is complex, and a number of factors must be considered. Designers should consider working with a professional roofing contractor or roof consultant. For professional help, call Roofing Columbus GA now!

Roofing

Applied vapor barrier (AVB) and polyisocyanurate are common insulations for built-up roofs. Felt plies are sometimes used in AVB. A layered construction is common for polyiso BURs.

The roof is one of the most important parts of a building because it protects against rain, snow, sunlight, and extremes of temperature. Choosing the right roofing materials can have a huge impact on how well a roof performs and lasts. There are many different roofing materials to choose from, and each has its own advantages and disadvantages. The most popular roofing material is asphalt shingles, which are cost-effective and durable. However, there are also other materials that offer a more unique look. Clay shingles have a beautiful Mediterranean style and are eco-friendly. They are fireproof and non-fading, and they can last up to 50 years. Metal is another option, and it offers superior durability in harsh weather conditions.

The choice of roofing material can have a big impact on the price and quality of a building, as well as its visual appeal. Traditional roofing materials include wood shingles, clay tiles, slate, and metal panels. In recent years, new roofing materials and systems have been developed to provide a greener alternative to traditional materials. For example, solar-powered roofing can reduce energy bills by providing an alternative source of electricity.

Other types of roofing materials include corrugated galvanized iron, copper, aluminum, and terne plate steel (which is stainless and has a tin coating). These are suitable for flat roofs or roofs with a pitch of 3:12 or greater. Some metal roofing is soldered or welded and can be fixed to timber joists or concrete slabs.

Alternatively, PVC membrane is an effective roof covering. It is highly durable and resistant to bacterial growth, industrial chemical atmospheres, root penetration, and extreme weather conditions. It is available in large sheets that minimize the number of seams, which are prone to leaks. It is often heat-welded and can be fixed to either nailable or nonnailable decks. It can be fully adhered or loosely laid and usually lasts 15–30 years.

Other low-slope roof coverings include thatch, which can be made from a variety of plants, including wheat, rye straw, or water reed. It is fire-resistant and can be curved to accommodate a building’s structure.

Installation

Whether you’re installing a new roof or replacing old shingles, a professional is your best choice. Choose a contractor who is credentialed by the product manufacturer and has good local references. Your homeowners’ insurance company may also have a list of recommended contractors.

XPS insulation is an environmentally friendly roofing material that’s sometimes used when re-roofing. It is more durable than polyisocyanurate insulation and does not absorb water like cellulose or fiberglass.

Installing a roof requires a lot of labor. Make sure to hire a crew that will work safely and efficiently.

Often, the most vulnerable areas are chimneys and valleys (where roofing planes meet). Sealing these areas with underlayment or felt paper is critical to preventing leaks. Replacing or repairing flashing, which covers the seams of chimneys and where roof planes meet, can also prevent leaks.

Maintenance

It’s important to keep an eye on your roof throughout the year to ensure that the shingles do not show signs of excessive wear or tear. During this time, you should also inspect the caulking around chimneys and vent pipes to prevent water leaks in these areas.

Another thing to look for is the growth of moss or lichen. These organisms can cause the material beneath shingles to decay, resulting in leaking or mold. Also, if tree branches hang over your house, it is a good idea to trim them on an annual basis to protect the structure and prevent damage during storms.

All maintenance crews are briefed on the needs and systems of the buildings they are servicing on that day’s schedule prior to arriving at your facility. This includes cleaning drains and gutters, pruning all trees and organic growth away from the roof, and re-flashing openings in penetration base flashing.

Repairs

Like painting a room or installing new cabinets, roofing is one of the larger home improvement projects you can undertake. And like those other projects, it’s important to start off right with proper preparation. That means getting into the attic or crawlspace and taking high-res pictures of every inch of that roof. Look for damp stains, any signs of standing water (which can be the first sign of major leaks), any paint that’s peeling, or any other obvious damage. Then check out the shingles, flashing, and valleys for any that are missing, thinning, or damaged.

If you do find damage, it’s time to call in the professionals. And don’t be afraid to have them take off all the shingles to see exactly what kind of condition your roof is in. If you do this, be sure to have a dumpster handy and tarps for the lawn underneath and the foundation plantings or shrubbery on the side.

The last thing you want is for these elements to get wet and start rotting or molding. Roof repairs aren’t always covered by insurance, though the cause of the damage might be—for example, hail or fallen tree branches could qualify as an accident and may be covered.

Some of the most common roof repairs include shingle repair, soffit repair, and dormer or truss repair. The cost of these services will vary depending on your location and the severity of the damage. A professional can help you estimate the cost of these services before they start and help you budget accordingly.

How to Clean Carpets at Home

Carpets act as filters, trapping dust, dirt, and allergens in their fibers. Carpet Cleaning El Dorado Hills CA helps them look better and reduces airborne pollutants, especially for those who suffer from asthma or allergies.

Carpet Cleaning

A professional cleaner uses detergents that are mixed to suit a particular type of fabric and is familiar with the best way to remove specific stains. They also have the equipment needed for hot water extraction, known as steam cleaning.

Dirt and other debris are the scourge of carpets, both residential and commercial. It can stain, discolor, and even degrade fibers. A carpet cleaning machine uses water, heat, and sometimes detergents to loosen ground-in dirt from the pile. Technicians also use specialized tools you won’t find at the hardware store, such as UV lights for spotting pet stains and powerful vacuums to remove the dirt afterward.

Professional cleaners also have access to the most advanced equipment available, such as hot-water extraction machines. This technique uses highly pressurized water heated to a temperature of 200 degrees Fahrenheit or higher to rinse away the most stubborn dirt and stains. The pre-conditioning solution that is applied to the carpet before this process helps to loosen stains and soils that are otherwise too deep in the fibers to be removed by vacuuming alone.

If you can’t afford to hire a professional, try the following tips for removing dirt and other debris from your carpeting:

Vacuum daily (at least once per week) to keep dust, dirt, and other particles from matting down your carpet fibers. This will not only help keep your carpeting clean, but it will also prevent premature wear and tear that could require a costly replacement.

Using doormats at every entrance to your home will help keep some of the dirt and other debris from being tracked onto your carpeting. If you have pets, keep them groomed regularly so that hair doesn’t get trapped in your carpeting.

If you notice that there is no residual dirt visible on the surface of your carpeting but a stain still exists, it may be time to employ a more intensive stain removal treatment. Mix a solution of one quarter teaspoon of detergent and a cup of warm water in a spray bottle. Dampen a cloth with this mixture and then apply it to the stained area. Repeat this blotting process until no more of the stain transfers to the cloth.

If your carpeting still appears stained, it may be necessary to use a more aggressive treatment, such as an enzyme-based carpet pre-spray or carpet shampoo. These chemical treatments typically require a little more effort to apply than traditional carpet cleaners, but they are often more effective at breaking down stains and odors.

Stains

Stains are the number-one reason homeowners turn to professional carpet cleaners. But there are many stain-removal techniques that can be used in the home to keep your carpets looking fresh and clean. The first step to removing a stain is blotting the affected area of the carpet with white paper towels or cloths to absorb as much of the liquid as possible. This can help reduce the chances of color change from the dye in the cloth or paper towel reacting with the cleaning solution.

Next, vacuum the area to remove any physical debris from the stain, and then wet the spot with a rag or sponge with cold water to prevent it from spreading. Once the stain is damp, apply a solution made from a tablespoon of mild dish soap like Dawn, a cup of white vinegar, and two cups of water to the affected area. Apply the solution to the stain using a soft brush or cloth, working from the outside of the stain inward to avoid spreading. Then, blot with a dry washcloth to remove any soapy residue and allow the area to air dry completely.

If the water and dish soap solution doesn’t work, try a solution of hydrogen peroxide and cold water. This works well for older stains, particularly those caused by red wine or pet urine. Start by blotting the affected area with cold water to remove any remaining liquid from the carpet, then use a spray bottle to apply the peroxide solution over the stained area. Use a clean section of blotting cloth frequently, and be sure to use only cold water to avoid the potential for color change from the dye in the washcloth or carpet fibers.

When the stain is removed, you can use a brush or steam vac to revive the carpet pile and then vacuum once more to remove any remaining traces of the stain. To prevent future stains, be proactive in keeping your carpets stain-free by installing doormats at all entranceways and by requiring residents and guests to remove their shoes before entering the house. A good stain prevention plan also includes keeping a bucket of water and a sponge with you at all times to soak up spills as soon as they occur.

Delicate Fabrics

There are many kinds of fabrics, each with its own care requirements. Using the wrong washing technique for delicate fabrics can result in them becoming tattered, discolored, or worn down. Lingerie made with silk or lace, thin knitted jumpers, and scarves are all examples of fabrics that can easily be damaged by a regular wash cycle. There is often a symbol on the label of these garments that will tell you to wash them on the delicate cycle.

You should also be careful when handling and sewing delicate fabrics. It is best to test your thread, needle, and tension settings on a scrap piece of your chosen fabric before you use it to make sure that the materials can withstand the stress of being sewn. If you use a machine to sew your delicate fabric, set the bobbin tension to a low setting. This will prevent the bobbin from catching and pulling on the delicate fabric. It is also best to backstitch for a few stitches when you are completing the seam, but be careful not to do this on too many occasions as it can cause the fabric to stretch and become pulled.

For general stains, you can remove them with household products such as hydrogen peroxide. Simply saturate the stain with the liquid and let it sit for a few minutes before blotting it clean. This solution is also effective for removing blood, wine, and coffee spills.

After cleaning your carpets, you can speed up the drying process by putting aluminum foil squares or wood blocks under all of your furniture. This will keep rust from metal casters and other stains from your furniture from transferring to the damp carpet. It is also a good idea to open windows and run ceiling fans, as warm air will help the fibers of your carpet dry quickly.

For extra help with keeping your delicate fabrics clean, you can purchase various types of stabilizers to use on your projects. These range from tear-away and dissolvable options to spray starch, which works well for projects that need a little support while still being very delicate.

Allergies

Allergies can be triggered by a wide variety of things. These include dust mites, pet dander, and mold spores. Dirty carpets are magnets for these allergens, and they tend to hold them far longer than hard floors do. Allergens can irritate your respiratory system and cause headaches, and they may also trigger conjunctivitis (pink eye). They can also contribute to fatigue.

Allergens can build up in the fibers of most carpeting, including low- and high-pile styles like Berber and Saxony. They can also settle in the padding of the carpet. Allergens can be a problem for individuals with asthma, as they can trigger an attack when breathed in.

Carpet cleaning can help remove the buildup of these irritants and prevent them from circulating in the air. It’s important to vacuum your carpet on a regular basis, and it’s a good idea to use a vacuum with a HEPA filter. The HEPA filter can remove more allergens from the carpet than a standard vacuum bag does.

Other ways to reduce the impact of allergies on your home and family are to install hardwood floors or use area rugs, as these do not collect as much dirt. It’s a good idea to clean area rugs on a regular basis as well.

Using an allergy-rated vacuum cleaner and regularly vacuuming your carpet will greatly reduce the impact of allergens on your health. It is also a good idea to spot-clean stains as soon as they occur. This will help prevent bacteria and mold from growing in them, which can trigger allergic reactions. Investing in an air purifier that has an allergy rating can also pull harmful pollen or mold out of the air before it gets on the carpet, further mitigating the need to deep clean your carpets on a regular basis. Taking these steps will also extend the life of your carpet and keep it looking its best.